Showing posts with label chocolate chip. Show all posts

Friday, November 22, 2013

Chocolate Chip Cookie Dough Rice Krispie Bars


What's better than eating raw cookie dough? I dare you to come up with something.  Because frankly, cookie dough is amazing.  And these bars are no exception.  Actually, they probably take cookie dough up a notch or two because it's sandwiched between two gooey layers of cookie dough flavored rice krispie treats.  Ah-mazing.  This recipe is from The Cookie Dough Lovers Cookbook and it's a must-read.  I was bookmarking almost every page until I realize that was a bit ridiculous and just threw it on my Christmas list (heeeyy, Mom).  But I slightly adjusted the recipe to make the krispie layer a little more gooey and adjusted the extracts to be a little more cookie-ish tasting.

Oh, and please excuse the picture, it was taken on my phone at school.  I brought these delicious treats in to our 11 hour long conference day when I thought the teachers would appreciate a sweet treat.  They didn't last past lunch :)

Ingredients:
Cookie dough:
1/3 cup butter, room temperature
1/4 cup white sugar
1/2 cup packed brown sugar
1 teaspoon vanilla extract
1 1/4 cup all purpose flour
1/4 teaspoon salt
3/4 cup chocolate chips, mini preferred


Rice krispies
12-14 ounces marshmallows (12 for regular, 14 for gooey-er)
2 tablespoons butter
1/2 teaspoon vanilla extract
1/4 teaspoon almond extact
1/4 teaspoon butter extract
7 cups puffed rice cereal

Directions:

Prepare the cookie dough:
1.  Cream the butter and the sugar in the bowl of a stand mixer until light and fluffy.  Add milk, vanilla, and salt, and mix until incorporated.  On low speed, add flour until thoroughly mixed in.  Stir in chocolate chips.

2.  Line a 13x9 inch baking pan with foil and lightly grease it.  Pat the cookie dough (it will be pretty sticky) into a smooth layer in the pan and refrigerate - at least until the krispie layer is done but overnight if you're making it ahead of time.  (Note: after I smooshed it down a little in the pan, I removed the foil and cookie dough from the pan, covered it with wax paper, and rolled it flat with a rolling pin to help it spread out better, then I put it back in the pan and smooshed the edges in).

Prepare the rice krispie layers:
3.  Melt the butter and marshmallows over medium low heat stirring constantly until smooth.  Add in the extracts (you can do all vanilla if you don't want to use or don't have the almond and butter extracts).  Gently fold in the rice cereal and stir to evenly coat.


4.  Remove the foil/cookie dough from the pan and lightly grease the pan.  Spread half the rice krispie layer on the bottom of the pan (grease your hands and work quickly but carefully since it will be hot, too).  Flip the layer of cookie dough onto the krispies, then top with the remainder of the rice krispies.

5.  Let cool and set for about a half hour (if you can really wait that long), and cut into desired sizes (I got 24 bars from mine).

Refrigerate if not serving immediately.  Best eaten within three days if they even last that long.

Tuesday, July 30, 2013

Chocolate Chip Cookie Bars with Peanut Butter Caramel Filling

Difficult: No
Time Consuming: No


This is one of my favorite desserts to bring to events because... 1) They come together quickly.  2) The filling makes them incredible soft.  3) The caramel adds a sweetness that's tempered by the peanut butter, so it's not too sweet.  4) I can't stop eating them.

These bars are amazing.  Possibly one of my favorite things I've made this year, they're that good.  The cookie layers perfectly sandwich the peanut butter caramel middle.  To make it extra special, as I was cooking the caramel for the filling, I dropped in a vanilla bean and stirred until all the little flecks of vanilla caviar speckled the gooey filling (just make sure you take it out before you spread it over the cookie base).


This recipe makes a 13x9" pan of incredible bars.  When you're spreading the first layer of cookie into the pan, you will worry that there is no way that two-thirds of the dough will cover it.  But just keep squishing it around until you get the whole bottom covered - it will seem thin, but the layer will puff up when it bakes.  For the cookie topping, I dropped teaspoon sized dough balls all over the surface, they puff up and spread out, but still leave little windows for the silky, gooey peanut butter caramel to peak through.

The Recipe:
yields one 9x13 pan, cut into whatever size you'd like

Ingredients
 chocolate chip cookie dough
1 3/4 cups all-purpose flour
1 teaspoon baking soda
1 teaspoon salt 

5 tablespoons unsalted butter, softened at room temperature
5 tablespoons shortening (if you have a tablespoon sized cookie scoop, it makes quick measuring from a tub of shortening)
1/2 cup packed light brown sugar
1/2 cup granulated sugar
1 teaspoon vanilla
1 egg
2 cups semi sweet chocolate chips 

Peanut Butter Caramel Filling
1/2 cup (4 oz) evaporated milk
11 ounces caramels, unwrapped (you can buy Kraft Caramels, Kraft Caramel Bits, or Werther's Original Chewy Caramels - I used Werther's because someone bought out all the Kraft caramels)
1/2 cup creamy peanut butter
*optional: the caviar from 1 vanilla bean, or 1 whole split vanilla bean

1/4 cup semi-sweet chocolate chips

Optional: Coarse salt, like Kosher or Sea Salt.  You can be extra special by using vanilla sea salt if you have it.

Directions

1.  Preheat oven to 375 degrees.  Line a 9x13" pan with foil - leave enough overhang so you can lift the bars out of the pan when they're done.  Set aside.  In a medium bowl, lightly whisk flour, baking soda, and salt together, set aside.

2.  In the bowl of a stand mixer, beat butter and shortening together until combined.  Add both sugars and beat for about 2 minutes - until light and fluffy.  Add egg and vanilla, beat until combined.  Mix in chocolate chips.

3.  Add half of the flour mixture, and mix until just combined.  Then add the remaining flour mixture and mix again until just combined.

4.  Take about two-thirds of the dough and press it into the bottom of the pan.  It will seem like it won't cover, but just keep smooshing it until it covers - it will be fairly thin.  Bake for 8-10 minutes, until it's just set and hardly brown.

5.  While the base layer is baking, begin making the filling.  Unwrap caramels and place in a medium saucepan.  Add peanut butter, evaporated milk (and the vanilla bean if you are using it).  Whisk over medium heat until smooth.

6.  When the cookie base is finished (which probably happened while you were making the filling), pour the peanut butter caramel over top, and spread evenly (if you put in a whole split vanilla bean, make sure to remove it.)  Sprinkle 1/4 cup of chocolate chips (or more, I'm not judging) over the peanut butter caramel.

7.  Drop teaspoon sized dough balls over the surface of the caramel layer.  Sprinkle lightly with salt (optional) and bake for 18-20 minutes (until the cookie dough on top is lightly browned)

8.  Cool completely in pan then cut into 24 squares (or however many you want).  I chilled mine in the fridge to make cutting a little easier.


From Everyday Reading

Monday, July 15, 2013

Fudge Puddle Cookies (gluten free!)

Difficulty: easy
Time consuming: prep 20 minutes, bake 10 minutes


When my husband and I drove home from Florida, we spent an awesome long weekend with my Aunt Kathy in Atlanta which included meeting up with a friend for lunch (hey, Rach!), going to the aquarium, and hanging out. About an hour into our drive home, we got a text from her saying that my wonderful husband left his favorite sneakers at her house and that she'd mail them back to us. She's awesome. As a thank you, I mailed her a care package of desserts including these cookies:


I call these fudge puddle cookies because I can't think of any other way to describe the intense chocolatey flavor of these treats. The cookie gets a lightly crisp exterior, like the delicate skin on the top of the best brownies, and the middles are chewy, dense, and fudge-y. The soft balls of dough melt into thin puddles packed full of delectable dark chocolate. And as a perk, these cookies are gluten free!! Milk was made for these cookies, so have a glass nearby!

Fudge Puddle Cookies
Makes about 20 cookies


Ingredients
1 1/2 cups bitter or semisweet chocolate chips, divided
3 large egg whites, room temperature
2 3/4 cups powdered sugar, divided
1/2 cup + 2 tablespoons unsweetened cocoa powder
1 tablespoon cornstarch
1/4 teaspoon salt

Instructions
1. Preheat oven to 350 degrees. Line 2 baking trays with parchment paper or spray with nonstick cooking spray and set aside.

2. In a small, microwave safe bowl, melt 1 cup of chocolate chips (microwave for 30 seconds on 50% power, stir, and repeat until smooth. Do not over heat or the chocolate will seize and be ruined). Set aside to cool slightly.

3. In a small bowl, whisk together 1 1/4 cup of powdered sugar, all the cocoa powder, the cornstarch, and the salt. Set aside.

4. In the bowl of a stand mixer with the whisk attachment, beat the 3 egg whites to soft peaks. Turn off mixer and add 1 cup of powdered sugar. Resume mixing until the mixture resembles marshmallow fluff and has soft peaks.

5. Add the flour mixture to the egg white mixture, mixing until incorporated and scraping down the sides and bottom as necessary. Mix in 1/2 cup of chocolate chips.

6. Place 1/2 cup of powdered sugar in a small bowl. Using a tablespoon size cookie scoop, drop scoops of dough into the sugar (the dough will be extremely soft but will hold its shape well). Coat evenly in sugar (shaking off excess) and place on baking sheet, leaving about an inch or so between each cookie.

7. Bake for 10 minutes. The tops will look cracked and the chocolate peaking through in between will look molten and under baked (it's not). Remove from oven, let cool on trays for 10 minutes (this helps make them chewy), then transfer to a wire rack to cool completely.

Eat with a glass of milk.


Adapted from Picklee

Sunday, May 5, 2013

Raspberry and Chips Cookies

Difficulty: No
Time consuming: No, I made these from start to finish in under 2 hours, and most of that was because I was socializing with a friend.


The staff at my school is super cool.  So cool I can't even tell you about it for a few weeks, or else I might ruin the surprise.  But let's just say it's epic, and when I can, I'll post a video.  But while practicing all this super cool and super secret awesomeness,  I made these cookies to share.  They are apparently the cookies that are sold at Disneyland near Splash Mountain.  Since I was around 6 the last time I was there, I couldn't tell you.  But regardless, they are amazing.


The cookies are packed full of white and semisweet chocolate chips and swirled with raspberry jam.  The flavors just party together and taste amazing.  The cookies end up soft and chewy, and just a little crispy on the edges.  Basically the perfect cookie that can satisfy just about anybody.

But as a side note, these may not be the best cookies for kids. Based on meticulous research (aka polling 3 students Friday morning), these cookies got a 0/3 vote with 5th graders (they were in favor of s'more brownies). And one child tester did not care for the cookie. However, adults loved them! Even my super picky, I-dont-like-sweets-but-if-I-do-they-better be-soft-Thin-Mints (wtf?) husband likes these cookies.

I can also imagine these cookies with chopped, toasted almonds in place of (or in addition to) the chocolate chips for a more sophisticated cookie.


Yields around 40 small cookies (made with a standard tablespoon sized scoop), or 13ish extra large, bakery style cookies (made with an ice cream scoop)


Ingredients
2 1/2 cups flour
1/4 teaspoon baking soda
1/4 teaspoon baking powder
1/4 teaspoon cream of tartar
1/4 teaspoon salt
1/2 cup butter (1 stick), room temperature
1/2 cup granulated sugar
1/2 cup brown sugar
1 egg + 1 egg yolk
1 teaspoon vanilla extract
1/4 teaspoon almond extract
4 tablespoons raspberry jam (More or less to taste)
3/4 cup white chocolate chips (about half the bag)
3/4 cup semi-sweet chocolate chips (about half the bag)

Directions

1. Preheat the oven to 350 degrees. In a small bowl, whisk together the dry ingredients (flour, baking soda and powder, cream of tartar, and salt), set aside.

2. Using an electric or stand mixer, cream the butter and sugars together until light and fluffy (note: mine never became "fluffy," just mixed together). Add the egg and egg yolk, continue to mix (note: at this point, my mixture started to look a little better, so I creamed for a minute or two). Add and mix in both the vanilla and almond extracts.

3. Add in dry ingredients and mix until just combined. Make sure to scrape down the bowl as necessary (note: my cookie dough was fairly dry at this point, but I just kept on with the recipe and it turned out ok). Gently mix in the white and chocolate chips.

4. Portion about 1/4 of the dough into a small bowl. Add around a tablespoon of jam and cut it into the dough with a butter knife. Do not over mix, you want solid stripes and chunks of jam.

5. Scoop and place on cookies on parchment lined sheets. Bake for 12-17 minutes, depending on the size of your cookie (note: my small cookies took 12 minutes, I rotated the pan after 7 minutes, and when they came out, the bottoms were golden brown and the tops were still pale and their centers still soft). Let cool on cookie sheet for 5 minutes (this helps maintain the chewy texture, if you want a harder cookie, move to a cooling rack as soon as the cookies aren't too soft).

Repeat steps 4 and 5 until all the dough has been jammed and baked.

These cookies are amazing warm from the oven or with a glass of milk. While baking, my friend and I may have eaten 5. You know, strictly for scientific purposes to make sure they were good enough to share with the other teachers.

Recipe from My Baker Lady. Her pics of these cookies are really pretty, go check them out.


Friday, March 1, 2013

Chocolate Chip Cookie Dough Cupcakes


Difficult: Not really
Time consuming: A bit, there are 3 components to these tasty treats


Let's get one thing straight: cookie dough is amazing.  I could eat it straight from the bowl; all day, every day.  But then my pants wouldn't fit, and that'd be bad.  Also the whole don't-eat-raw-eggs thing.  For real, don't eat raw eggs.  I used to reside in the camp of "I never get sick from eating batter/dough/etc," until I got sick (not from this recipe).  It's totally not worth it so don't eat raw eggs.

Luckily for you, and for me, these cookie dough cupcakes are completely safe to eat and taste exactly like cookie dough.


I slightly adjusted the cake recipe to include browned butter which brings out a slight nuttiness.  You don't have to brown the butter, but I really liked the nuance of flavor it added.  However, after I browned the butter (and maybe turned my back from it for only a second), I noticed some browned bits and I didn't want them speckling the cupcake, so I strained it through a coffee filter.  I also adjusted the bake time and temperature - starting the oven at 350 degrees and then reducing it to 325 as soon as the cupcakes went in.  Then I baked them for 20 minutes.


Like most cupcakes I make, this was a two day process. I made the cupcakes and cookie dough first. On the second day I made the frosting, assembled the cupcakes, and garnished so they were pretty.

These cupcakes went with my husband to the church fish fry where he volunteers on Friday's during Lent.  I work out with my trainer on Friday afternoons but am happy to spend my afternoons/evenings on Thursdays whipping up tasty treats for the bake sale there.
Ha ha ha :)

The recipe
Yields 24 standard sized cupcakes and 10 mini cupcakes.

Ingredients
cupcakes
2 2/3 cups all-purpose flour
1 teaspoon baking powder
1 teaspoon baking soda
¼ teaspoon salt
3 sticks unsalted butter, room temperature
1½ cups light brown sugar, packed
4 large eggs
1 cup milk
2 teaspoon vanilla extract
1 cup chocolate chips (semi- or bittersweet) - optional - I might leave these out next time I make them since they sank to the bottom of the cake anyways.

Cookie dough filling
4 tablespoons (half of a stick) unsalted butter, at room temperature
6 tablespoons. light brown sugar, packed
1 cup plus 2 tablespoons all-purpose flour
7 oz. sweetened condensed milk (half of a can)
½ teaspoon vanilla extract
¼ cup mini semisweet chocolate chips

Frosting
2 sticks unsalted butter, at room temperature
½ cup light brown sugar, packed
2 1/3 cups powdered sugar
2/3 cup all-purpose flour
½ teaspoon salt
2 tablespoon milk
2 teaspoon vanilla extract

Garnish (optional, but pretty)
Tiny chocolate chip cookies
Mini chocolate chips

Directions

cupcakes
1.  Preheat oven to 350 degrees.  Line 24 standard size muffin cups with liners and set aside.  In a medium bowl, whisk together the flour, baking powder, baking soda, and salt.  Set aside.

2.  Optional: brown 1 stick of butter in a saucepan - put butter in saucepan set to medium, stir frequently until the butter takes on a dark browned color.  If you accidentally end up with some browned bits,  strain through a coffee filter.  Set into the fridge to cool a little while you continue to work.

3.  In the bowl of a stand mixer, cream the butter (2 sticks unless you've chosen not to brown a stick, then it's all 3) with the brown sugar until light and fluffy.  Add vanilla and eggs 1 at a time, mixing thoroughly between each addition.

4.  Add 1/3 of the flour mixture to the butter mixture, and mix until combined.  Then add half of the milk, mix.  Then add the second 1/3 of the flour mixture, mix.  Then the second half of the milk, mix.  Then the remaining 1/3 flour mixture, mix.  At this point, all the milk and flour should be mixed in.  If using chocolate chips, fold them in now.

5.  Fill cupcake tins about 2/3 of the way full.  After I filled 24, I still had enough batter for 10 mini cupcakes.  Put cupcake in the oven, reduce oven temperature to 325 degrees, and bake for 20 minutes, or until the tops spring back slightly when pressed.  Let cool in pan for 5 minutes, then transfer to wire rack to cool completely.

Make the cookie dough filling
6.  In the bowl of a stand mixer, combine brown sugar and butter.  Add flour, milk, and vanilla, and mix until well combined.  Stir in chocolate chips.  Wrap in plastic wrap and refrigerate for at least an hour, or overnight.

Make the frosting
7.  In the bowl of a stand mixer, beat butter and brown sugar until mixed.  Add salt and powdered sugar and mix on low.  Add flour (1/2-2/3 cup, this really makes it taste like cookie dough - I was hesitant to include this but it was awesome).  Then milk and vanilla.  Whip on high speed for a few minutes until the mixture becomes fluffier.

Assemble
8.  Cut a hole into the cupcakes using a cupcake plunger or the cone method.  Set holes/tops aside.

9.  Roll cookie dough into 24 equal sized balls.  Split the dough in half, then split each half in half.  Split each piece into 6 equal parts and roll into balls.  Ta-da, you know have 24 even sized dough balls.  Put one dough ball into each cupcake.  Cut the bottom of the cone/cupcake hole off, and place the top back into the cupcake.  Check out Baking Bites for a better description on how to do this, complete with pictures.

10.  Put the frosting in a piping bag fit with whatever tip you'd like to use.  Top the cupcakes, then garnish with mini chocolate chips and a mini chocolate chip cookie.


Basically, there are two camps for cookie dough filled cupcakes.  The first is what I've done: make a cake, core and fill with dough, then frost.  The second has you make the cookie dough a day ahead of time and freeze cookie dough balls overnight, then add the frozen dough balls to the cupcake batter and bake until the cakes are done.  The problem with this is that you run the risk of baking the cookie dough in the cupcake.  Also it requires more time since you have do make the dough ahead of time.  If anyone has had success with the latter method, let me know how you did it and how it worked out for you! :)

Slightly adapted from Annie's Eats.

Tuesday, December 25, 2012

Hot Chocolate Cookies


Difficult: No way, Jose.
Time consuming: Nah.  About 10 minutes to mix up the cookie dough, and 10 minutes per sheet pan to bake.

Merry Christmas, everyone. Here's a recipe that made it to my cookie trays this year, enjoy!!

These cookies are incredible.  They taste just like hot cocoa and even have the little mini 'mallows in them (they don't get baked out!).  The cookies have a soft and chewy texture and is loaded with awesome cocoa flavor.  They have made it into my limited selection of cookies to make every Christmas, and probably more often than that.  My husband does not love sweets the way I do but he's already requested a second batch of these cookies, so that's how I know they're good.

The recipe makes a lot, about 5 dozen or so cookies.  Which makes it great for a cookie exchange party (where I took them last week) or for an office party, or for anyone who really, really, loves hot chocolate.  The recipe halves nicely, too, in case you don't need that many cookies.

FYI: this recipe calls for Kraft "'Mallow Bits" which I found at Krogers near the hot chocolate and coffee.  If you can't find mallow bits, I'm sure regular ol' mini marshmallows will be equally as tasty.  Rumor has it that Target also carries Mallow Bits.

Yields: About 60 cookies

Ingredient:
 2 sticks (1 cup) butter, room temperature
1 cup of sugar
2/3 cup brown sugar
2 eggs
1 teaspoon vanilla
3 1/4 cup flour
4 packs of hot chocolate mix (not sugar free) (around 1/4 cup cocoa mix, if you have a canister rather than packets)
1/2 teaspoon salt
1 1/4 teaspoon baking soda
2 cups chocolate chips (milk or semisweet) (about 1 full 12-oz bag)
1 cup (half of the container) 'Mallow Bits

Directions:

1.  Preheat oven to 350 degrees.  Line a baking sheet with parchment paper and set aside.

2.  In a medium bowl, whisk to combine the flour, hot cocoa mix, salt, and baking soda.  Set aside.

3.  In the bowl of a stand mixer (with paddle attachment), cream the butter and the sugars until light.

4.  Add eggs and vanilla to the butter/sugar mixture.  Mix to combine.

5.  Add the flour to the bowl of the stand mixer and mix until it seems evenly incorporated (I did mine about a cup or so at a time), (the dough will seem really thick).

6.  Add the chocolate chips and 'Mallow Bits.  Mix until evenly distributed.  My KitchenAid was clunking around but it managed, and yours will, too.

7.  Drop tablespoon fulls of dough (I used my dough scooper) onto the parchment and bake for 10 minutes.

**While the first batch was baking, I scooped the rest of my dough onto a wax paper lined cookie sheet and popped it into the fridge.  I don't know if you need to do this, but it does help the cookies from spreading too much during baking.

8.  The cookies may look underdone, but if you want a soft and chewy cookie, take them out now, let cool on the sheet pan for a few minutes, then transfer to a wire rack to cool completely.


Slightly adapted from Baked Bree.

Friday, December 14, 2012

Mini Chocolate Chip Scones


Difficult: No way.
Time consuming: About 30 minutes to make, a 30 minute rest, and 20 minutes to bake.

I saw these mini chocolate chip scones on Pinterest and knew they would be my next sweet for our special ed team meeting.  Honestly, I had never had a scone before - which is actually pretty terrible considered I spent 10 days in London on spring break for a study abroad my freshman year of college.  So I didn't really know what to expect but these were great!...especially with a cup of coffee!!  These were sweet with bursts of chocolate in every bite. They have a drier texture compared to a cookie (making it so dunkworthy) but I really love how they turned out.  And the glaze was super easy to apply and helps hold in some moisture so they can last a few days before going stale (but only if they last that long!)

Prebaked.  They can all get squished pretty close on a baking pan.
I've been doing a crazy amount of baking with the holiday's coming up...so many great treats to share on here (eventually). First I made cut out sugar cookies, then I made these scones, then hot chocolate cupcakes with marshmallow buttercream to share at school, then hot chocolate cookies for a cookie exchange, then all the rest of my regular holiday baking (which I'm toning down this year to a chocolate cookie, my cut out cookies, peppermint shortbread, and soft ginger cookies).  Phew.  It's getting exhausting but I am loving every minute of it :)
 
The Recipe:
yields 32-64 scones, depending on how you cut them
 Ingredients:
Scones:
 2 3/4 cups all purpose flour
1/3 cup granulated, white sugar (I used vanilla sugar)
3/4 teaspoon salt
1 tablespoon baking powder
1/2 cup (1 stick) cold butter, cut into pats
1-2 cups mini chocolate chips (I used 1 bag, which is two full cups)
2 eggs
1 1/2 teaspoon vanilla extract
1/2 teaspoon almond extract (but if you don't have it, you can up the vanilla to a full 2 teaspoons)
1/2 to 2/3 cup milk

Glaze: (honestly I had so much extra, you could probably reduce the quantities listed below but I haven't tried)
3 1/2 cups powdered sugar
7 tablespoons water
1 teaspoon vanilla extract
 
Directions:

Before you start, line a large (18"x13") baking pan with parchment paper, and set aside.

1. In a large bowl, whisk flour, sugar, salt, and baking powder together.  Cut in the butter with a pastry blender or 2 forks.  The mixture will be unevenly crumbly and some large chunks of butter might remain, but that's ok.  Stir in your chocolate chips.

2.  In a separate bowl, whisk together the eggs, vanilla extract, almond extract, and 1/2 cup of milk.

3.  Add liquid ingredients to dry ingredients and stir until all the flour mixture has been moistened and the dough seems to stick together.  If it seems too dry, add a little more milk until it forms a nice dough.

4.  Well flour a work surface, and scrape the dough into a ball.  Roll it into an 8"x8" square, it should be about 3/4" thick.  Cut into 2" squares (so you have 16 squares), then cut each square diagonally into a triangle.  (I used a pizza cutter).  Transfer the triangles to the baking pan (I used an offset spatula to help with this) - you can keep them pretty close together because they don't spread a lot during baking.  All the triangles should fit onto one large baking pan.

5.  Pop the pan of scones into the freezer for 30 minutes.  In the meantime, preheat the oven to 425 degrees.

6.  After they chill, bake for 17-20 minutes, rotating the pan once during baking.  They'll be golden brown when their done. (Note: at 19 minutes, the bottoms on mine were on the verge of being over done).

7.  If you want smaller scones, cut each triangle in half down the center as soon as they come out of the oven (if you do this, you'll have 64 small triangles).  I didn't cut mine again, but I wish I would've made some of them smaller, it's nice to have the option of a small snack or just a bite.

8.  Let them cool on the pan for 10 minutes.  Then pop into the freezer for 10 minutes to quickly cool them.

9.  Prepare the glaze by mixing the powdered sugar, water, and extract in a bowl with a whisk.  Line a baking sheet with wax paper, pour a little less than half the glaze into the pan.  Take the scones out of the freezer and place them into the glaze.  Pour the remaining glaze over the scones.  Using a pastry brush, schmear the glaze all of the tops and the sides of the scones.

10.  Transfer the scones to a cooling rack and let the excess glaze drip off (I put wax paper under my rack to catch drips).  Allow the glaze to set before serving.


Recipe slightly adapted from King Arthur Flour.  Head on over there for some great step-by-step pictures.

Thursday, September 27, 2012

Jacques Torres Chocolate Chip Cookies

Difficult: Not any more so than other cookie recipes
Timely: only passively, the cookies have to sit overnight before baked.


These chocolate chip cookies are the bomb-diggity!!  They bake up huge and thick, the outside gets crisp while the inside stays incredibly soft and chewy and full of chocolate.  This is the infamous recipe by Jacques Torres and was published in the New York Times.  It's been floating around Pinterest for quite some time but I always put off making it because it includes bread flour and cake flour which I don't keep on hand.

Don't let the inclusion of bread flour and cake flour deter you from making these cookies. Believe me I put off baking anything that included "other" flours (aka not all-purpose) but these have changed my mind. The bread flour, with it's extra gluten, give the cookies their heft. The cake flour (with a lower gluten content) offsets the bread flour for a delicate and chewy bite. Trust me, it's worth it.

These cookies are freakin' huge! After I made the dough, I weighed it and it came in at a whopping 4 pounds and 5 ounces. And 1 pound of that came from the chocolate chips. JT would tell you that making your cookies huge are one of the secrets to their success (3.5 ounces per cookie). But I'm a quantity girl and I discovered a chewy and crisp cookie weighing in at only 1.75 ounces. Although not as thick, still incredible in my book.

The one on the left weighs 3.5 ounces, the one on the right weighs 1.75 ounces.
3.5 ounce cookie bakes to around 5-6 inches in diameter.
The 1.75 ounce cookies bakes to about 3 inches in diameter.

The only downer to this recipe is that it doesn't offer immediate gratification - once you prepare the dough, you have to wait an excruciating 24-36 hours before you bake. Torture, I know. But totally worth it. The overnight sit in the fridge helps the dough come together and allows all the liquid ingredients to really absorb into the dry ones, which helps to produce a chewy texture and to not spread too much when they bake in the oven.


The recipe

Ingredients
2 cups minus to 2 tablespoons cake flour
1 2/3 cup bread flour
1 1/4 teaspoon baking soda
1 1/2 teaspoon baking powder
1 1/2 teaspoon salt
1 1/4 cups (2 1/2 butter) butter, unsalted, room temperature
1 1/4 cups light brown sugar
1 cups plus 2 tablespoons granulated sugar
2 large eggs
2 teaspoon vanilla extract
1 1/4 pounds chocolate (the original recipe recommends at least 60 percent cacao content, I just used 2 bags of semisweet)
Sea salt for garnish

Directions

1.  In a medium bowl, whisk together the flours, baking powder and soda, and salt. Set aside.

2.  In the bowl of your stand mixer with the paddle attached (or using a hand mixer), cream the sugars and butter until light and fluffy (about 5 minutes set to speed 6 on a Kitchen Aid). Decrease the mixer speed and add eggs one at a time mixing thoroughly after each addition. Add the vanilla and mix until incorporated.

3.  Slowly add the flour mixture and mix until just incorporated, about 5-10 seconds. Add chocolate chips and mix until evenly distributed. You can mix the chips in by hand if you prefer. Whichever floats your boat.

4.  Press Saran wrap over the surface of the dough and refrigerate 24-72 hours. Or create a neat little block of cookie dough and wrap in Saran wrap and pop that into the fridge if you don't want the bowl taking up space.

5.  Weigh out dough using a digital kitchen scale to 3.5 or 1.75 ounces, then bake at 350 degrees according to the specifications below:
  • Large cookies will bake to 5-6" in diameter and will yield 18-20 cookies: weigh dough out to 3.5 ounce balls (a little bit larger than golf balls).  Space dough a few inches apart (4-6 to a sheet unless you have huge professional sheets, then you can do more) on a parchment lined baking sheet.  Garnish with sea salt. Bake for 18-20 minutes.
  • Smaller (but not small) cookies will bake to 3" in diameter and yield around 3 dozen cookies: weigh dough out to1.75 ounce balls (just smaller than a golf ball) and place a few inches apart on a parchment lined baking sheet (6 fit on a regular baking sheet for me).  Garnish with sea salt.  Bake for 14-16 minutes. 
 Some tips:
  • Take cookies out of the oven just when the tops are starting to look brown for a softer cookie.  
  • Rotate your pans during baking- especially if your oven has hot spots. 
6.  Leave cookies to cool on pan for 10 minutes then transfer to a wire rack to cool completely. Or eat immediately with milk.

If you dislike the odd quantities of ingredients required for these cookies (although I honestly didn't have a problem measuring out 2 cups plus or minus 2 tablespoons), check out the Cilantropist's version of these cookies.

Inspired by Bakerella 
Some input on size from the Cilantropist
Recipe from ABC's The Chew

Thursday, June 21, 2012

Chewy Brownies & Thick and Chewy Chocolate Chip Cookies

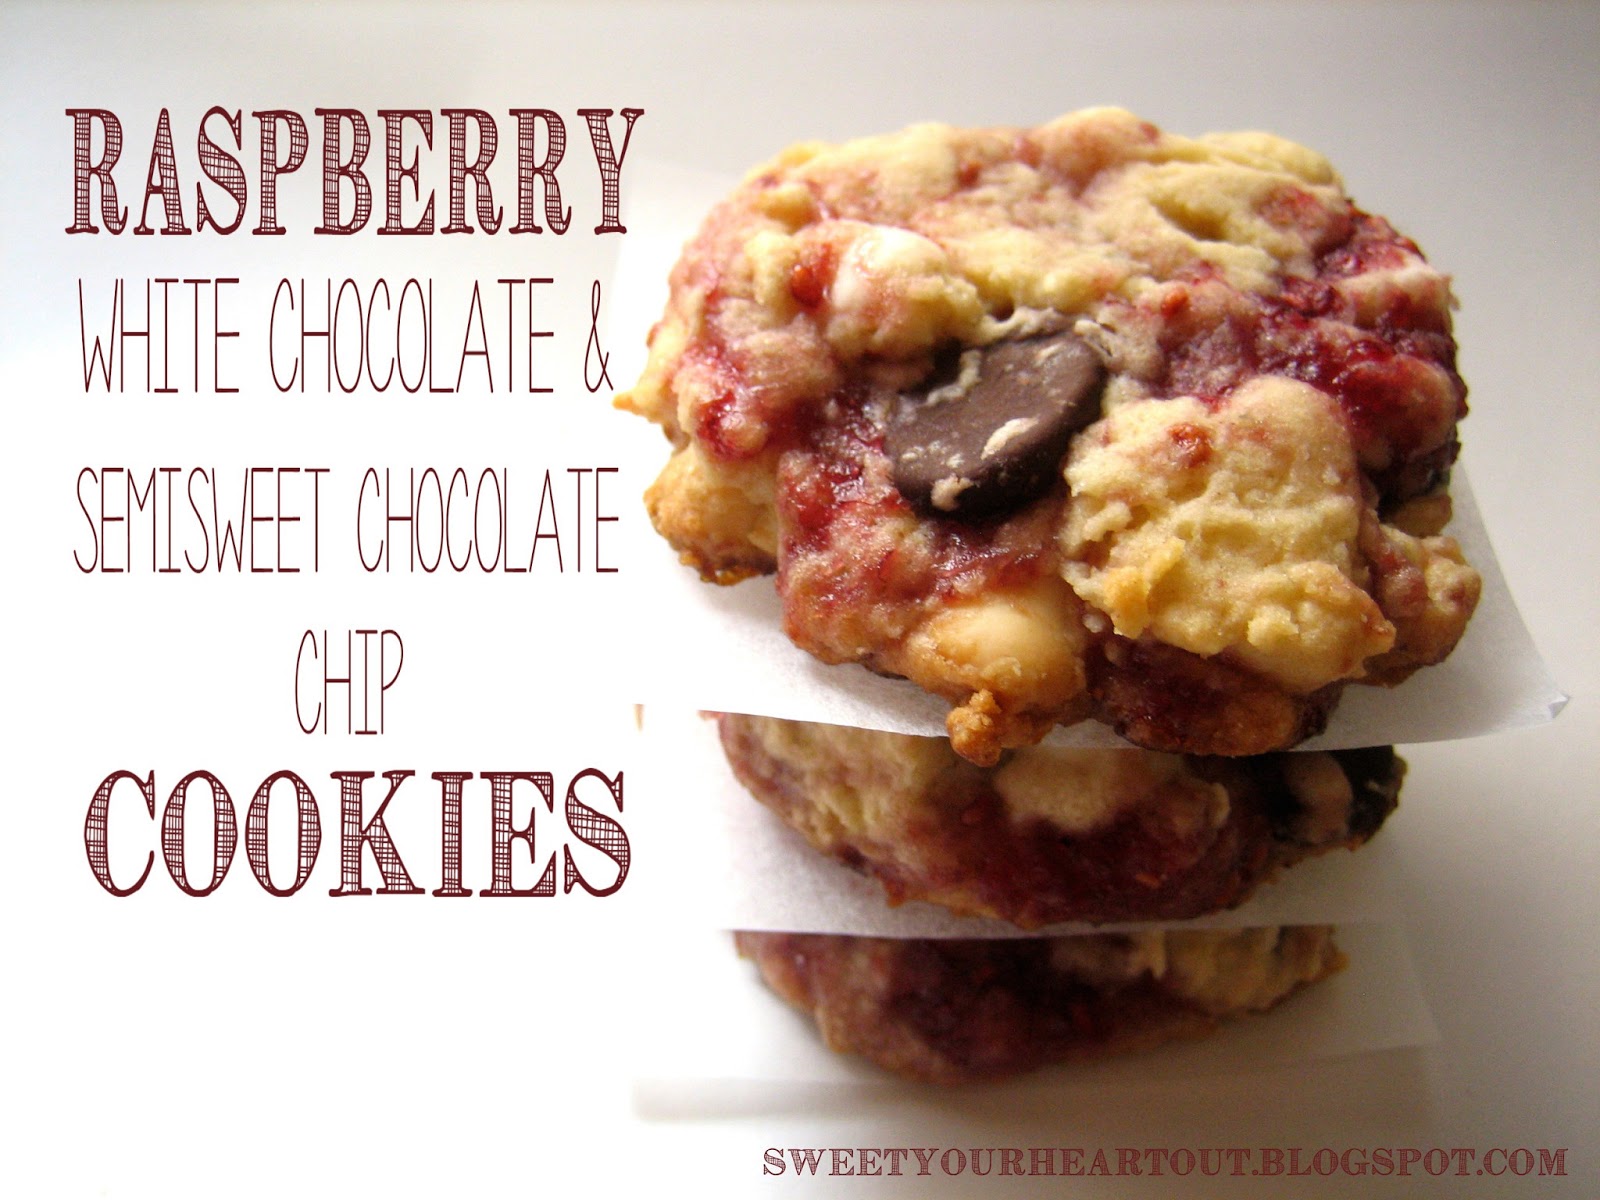
Last week, my husband and I spent the week in Sanibel Island, Florida with my brother and his girlfriend. Look how pretty it was:


It was an 18 hour drive from Ohio, and let me tell you I am NOT much of a car trip person. But it was worth the savings in gas, and it let me visit some family in Georgia. I thought it'd be nice to have some home baked goodies for the drive and while on vacation. I stumbled around Brown Eyed Baker for awhile and came across two recipes that really interested me: Thick and Chewy Chocolate Chip Cookies and Chewy Brownies. Both from the America's Test Kitchen crew, so I figured they couldn't be bad.


They were good. They weren't great. But they were good. I much prefer the brownies I made a few weeks ago, which I just made again yesterday and shared with family. As for the cookies, I deviated ever so slightly from the recipe, and while they tasted awesome, their chewy texture didn't last for more than a day - likely because I made my cookies smaller than the recipe recommended which I recently learned can affect texture if your not careful about baking time. Either way. Both recipes were good, but I probably wouldn't make either again. But give them a try, you be the judge!

Up first: Chewy Brownies!


Ingredients

1/3 c Dutch-processed cocoa (I used regular, unsweetened cocoa, but dutch processed is supposed to give a better flavor.  Use it if you have it)
1½ t instant espresso (optional, but I used it - it helps deepen the chocolate flavor)
 ½ c plus 2 T boiling water (5 oz)
2 oz unsweetened chocolate, finely chopped
4 T (½ stick) unsalted butter, melted
½ c plus 2 T vegetable oil
2 large eggs
2 large egg yolks
2 t vanilla extract
2½ c (17½ oz) sugar
1¾ c (8¾ oz) all-purpose flour
¾ tsalt
6 oz bittersweet chocolate, cut into ½-inch pieces

1. Preheat the oven to 350 degrees and check to make sure the oven rack is in the lowest position. Line a 9×13-inch baking pan with foil or parchment paper (leave an inch or so overhang on all sides). If using foil, spray with nonstick cooking spray.  Set the pan aside.

2. Sift cocoa into a large bowl and whisk with espresso powder and boiling water together until smooth. Add unsweetened chocolate and whisk until chocolate is melted. Whisk in melted butter and oil (the mixture may look curdled - don't worry) Add eggs, yolks, and vanilla and continue to whisk until smooth and fully combined.

3.  Whisk the sugar into the chocolate mixture. Add flour and salt and mix with rubber spatula until there are no streaks for flour visible. Fold in bittersweet chocolate pieces.

3. Pour and scrape the batter into the pan and bake for 30 to 35 minutes - until toothpick inserted halfway between edge and center comes out with just a few moist crumbs attached. Transfer pan to wire rack and cool 1½ hours (don't remove the brownies from the pan yet).

4. Using the foil/parchment overhang, lift the brownies from the pan. Continue to cool the brownies on the wire rack and let cool completely (this takes about 1 hour). Cut into desired sizes and serve.


awesome with a glass of milk!

 (Brown Eyed Baker took this recipe from Cook’s Illustrated, March & April 2010 issue)

Up next, Thick and Chewy Chocolate Chip Cookies:


Ingredients: (For this recipe, I tried weighing my ingredients using a digital kitchen scale, since that was what was recommended from the original recipe, but measuring cups work just fine if you don't have one)

2 c plus 2 T (10 5/8 ounces) unbleached all-purpose flour
1/2 t baking soda
1/2 t salt
12 T (1 1/2 sticks) unsalted butter, melted and cooled until warm
1 c packed (7 ounces) light or dark brown sugar
1/2 c (3 1/2 ounces) granulated sugar
1 large egg plus 1 egg yolk
2 t vanilla extract
1-1 1/2 cups semisweet chocolate chips

1. Adjust the oven racks to the upper- and lower-middle positions and heat the oven to 325 degrees. Line 2 large baking sheets with parchment paper or spray them with nonstick cooking spray.

2. Whisk the flour, baking soda, and salt together in a medium bowl; set aside.

3. Either by hand or with an electric mixer, mix the butter and sugars until thoroughly blended. Beat in the egg, yolk, and vanilla until combined. Add the dry ingredients and beat at low speed just until combined. Stir in the chips to taste.

4. Roll a scant 1/4 cup of the dough into a ball. Hold the dough ball with the fingertips of both hands and pull into 2 equal halves. Rotate the halves 90 degrees and, with jagged surfaces facing up, join the halves together at their base, again forming a single ball, being careful not to smooth the dough’s uneven surface. Place the formed dough balls on the prepared baking sheets, jagged surface up, spacing them 2 1/2 inches apart. This should give you an idea of how to do it - it's what gives bakery cookies their unique surfaces (image from Baking Illustrated, uploaded by Brown Eyed Baker).

5. Bake until the cookies are light golden grown and the outer edges start to harden yet the centers are still soft and puffy, 15 to 18 minutes, rotating the baking sheets front to back and top to bottom halfway through the baking time. Cool the cookies on the sheets. Remove the cooled cookies from the baking sheets with a side metal spatula.


yum!
(Brown Eyed Baker took this recipe from the book Baking Illustrated on page 434)