Difficult: Parts of it
Time consuming: yea, it's a layer cake with lots of homemade components

My birthday was last week and we had a few friends over to drink, watch college basketball, play cards, and of course eat cake.
I spent weeks putting together the perfect birthday cake. I looked over dozens of different recipes to pull this all together. From different chocolate cake recipes, to coffee buttercreams, crunchy fillings, caramels.......My mind probably went at least 4 different routes before deciding to make a cake inspired by one of my favorite ice creams: Ben and Jerry's Toffee Heath Bar Crunch.
The chocolate cake I made was from the book Baked (there are 3 of them, all of which I highly recommend, but I don't remember which one this came from, but it was the Sweet & Salty Cake from their cookbook). It turned out a little dry which was due to overbaking on my part - I have a very temperamental oven. The batter is split between 3 cake pans and I had to put 2 on one rack and 1 on the other. After the recommended baking time, all 3 of my cakes were still very wet in the middle. After about 5 more minutes, they were still a bit "batter-y," so I did another few minutes. Then they were pushing dry. Boo. In the future, I think I will stick to Bakerella's chocolate cake recipe since I made it once and didn't botch it.
I made a coffee flavored Italian meringue buttercream. I highly recommend Italian buttercream, even though it's a little more work than traditional American style - you have to cook sugar but don't let that scare you away. The texture is so smooth - my husband always complains that American buttercream tastes "flour-y." But not this. And because you use cooked sugar instead of a bag of powdered sugar, the resulting flavor isn't cloyingly sweet.
In this cake, I wanted to include a crunchy aspect, since Ben & Jerry's Coffee Heath Bar Crunch is full of crunchy bits of toffee. And I don't know if it was because I was already thinking about ice cream and cake, or if something I saw on Pinterest lodged itself to the back of my mind, but I decided to make the crunchies from Dairy Queen cakes to put in between the layers. And toffee, too, of course. Then because I was thinking about ice cream cake, I threw in a layer of fudge ice cream topping, too.
This is probably a multi-day project. It was for me at least. I made the chocolate wafer cookies used for crunchies a few days ahead of time, made the chocolate cake the day before I planned to serve the cake, and made the frosting and assembled the cake the morning I planned to serve it. It can most certainly be done in 1 day, but I got antsy and started making the parts early.
It's a birthday cake. By no means low calorie. Definitely an indulgence. Totally worth all the work.
The Recipe:

Ingredients:
Cake
3/4 cup cocoa powder
2/3 cup sour cream
1 and 1/4 cup hot water (hottest from the tap is fine)
3/4 cup unsalted butter, room temperature (1 and 1/2 sticks)
1/2 cup vegetable shortening (like Crisco)
1 and 1/2 cups white granulated sugar
1 cup brown sugar
2 and 2/3 cup all purpose flour, plus extra for dusting the pans
2 teaspoons baking powder
1 teaspoon baking soda
1/2 teaspoon salt
3 large eggs
1 tablespoon pure vanilla extract
Italian meringue buttercream, coffee flavored
5 large egg whites
10 ounces (1 and 1/4 cup) white granulated sugar, separated
1/4 cup cold water
4 sticks (1 pound) unsalted butter
2-3 tablespoons instant espresso powder, mixed with equal parts warm water 'til dissolved
filling
1 jar of fudge ice cream topping
half of a bag (more or less, I didn't measure) of crushed toffee bits (either Heath or Skor; can be found in the baking aisle by the chocolate chips)
1/4 of a baked recipe (9 ounces) of chocolate wafer cookies or 2 rows of Oreo cookies from a standard Oreo package
1 7.25 ounce bottle of magic shell ice cream topping (found by other ice cream condiments)
Directions:
Cake
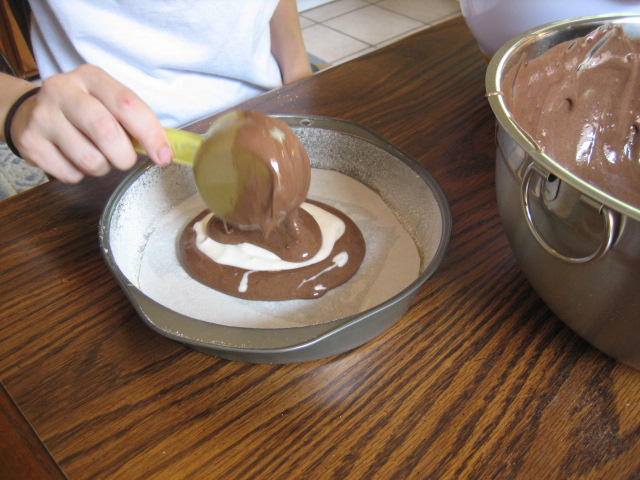
1. Cut 3 rounds of parchment to fit the bottom of an 8 inch round cake pan. Spray the pan with nonstick cooking spray, put in a round of parchment, spray again, then dust with flour to evenly coat. Repeat with the other 2 pans and set aside. Preheat the oven to 325 degrees.
2. In a small bowl, combine the sour cream, hot water, and cocoa powder. Whisk to combine and set aside.
3. Combine the butter, shortening, and sugars in the bowl of a stand mixer and mix with the paddle attachment until fluffy and ribbon-like. While that's going,in a separate bowl, whisk to combine the flour, baking soda, baking powder, salt; set aside. Going back to the butter and sugar - add eggs 1 at a time, mix until combined, add vanilla, and mix until combined.
4. Add flour mixture to the sugar in 3 additions, alternating with the sour cream mixture, beginning and ending with the flour.
5. Spread evenly between the 3 cake pans. Bake for 35-40 minutes, or until a toothpick inserted in the center comes out with a few moist crumbs. Rotate during baking. When the cakes are done, let cool in the pans on a baking rack for 20-30 minutes. Run a knife around the edges, flip out of pans, and let cool on baking racks completely.
*The cake can (and probably should) be made at least a day ahead of time. Once cooled, wrap in plastic wrap and refrigerate. "Cold" cakes are easier to slice, which you'll need to do to even the tops before stacking.
Icing
6. In the bowl of a stand mixer fitted with the whisk attachment, whisk the egg whites on high speed until you get stiff peaks. Don't over beat, you don't want them to be dry. Once you get to stiff peaks, slowly add 1/4 cup of sugar in a steady stream to the running mixer. This is a meringue.
7. While the egg whites are whisking, gently stir1 cup of sugar with 1/4 cup of water in a 1-quart, heavy bottomed sauce pan. Heat until the sugar syrup reaches 245 degrees on a candy thermometer. Don't stir while this is happening.
8. Once the sugar has reached 245 degrees remove from heat briefly and let the bubbles subside. The meringue should be ready (egg whites whipped, sugar added, stiff but not dry peaks) by now, if not, finish up. With the mixer on medium to high speed, slowly stream the sugar syrup into the meringue (try to get between the whisk and the bowl - if you hit the whisk you'll end up with hard, spun sugar all around you bowl and not mixed into your meringue). Whisk on high for 6-10 minutes, until the bowl is cool to the touch (if the mixture is too hot when you add the butter, the butter will melt - not the end of the world but a pain in the butt for sure).
9. Once the meringue has cooled, continue to whisk on medium to high and add butter, 1 tablespoon at a time. The mixture may separate and look like scrambled eggs, but just keep going, keep mixing, it will come back together.
10. Once all the butter has been added, decrease the mixer speed and add the 2-3 tablespoons of instant espresso liquid (more or less to taste). Increase mixer speed until everything is completely incorporated and the frosting is smooth.
Filling
11. Take 9 ounces of prepared wafer cookies and crush (either in a bag with a rolling pin or in a food processor). The cookies should be in small chunks, not fine like sand. Mix with the bottle of magic shell and set aside.
Set aside both the ice cream fudge filling and bag of toffee bits.
Assemble and decorate
12. Pull the cakes out of the fridge and level the tops. Put a dollop of buttercream on a cake stand and center the bottom layer of cake on it. Make sure it's where you want it to be, you won't be able to move it once you get started. (*Note: I put my cake stand on a lazy susan so that I can spin the cake while frosting and decorating)
13. Melt the jar of fudge ice cream topping per directions on the label. Spoon out about 1/3 of the fudge on the cake and spread evenly to the edges.
14. Put half of the wafer concoction on the fudge and spread evenly. Add about 1/4 of toffee bits (more or less to taste, I didn't really measure). Gently press into the fudge.
15. Spread a thick (but not too thick) layer of coffee buttercream over the cookies and toffee. Spread to the edges.
16. Add the next cake, repeat steps 13-15. Then top with the last cake.
17. Crumb coat the entire cake by putting a thin layer of frosting over the tops and sides of the cake. Refrigerate for at least 1 hour.
18. Frost the cake however you'd like. I gave the top a nice layer of frosting, then put the rest in a bag fitted with a large round tip. I dotted 6 large dots up the side of the cake, then used an offset spatula to pull the dot sideways. Then added 6 more dots vertically over the frosting I pulled from the first set of dots, then pulled them sideways. And repeat, repeat, repeat, until the side of the cake is frosted. I kinda got stuck at the very end when the last row of dots met the first, so I just stuck that in the back. The My Cake School blog has a good tutorial with pictures on how to do this technique.
19. Refrigerate the cake. Pull out of the fridge at least 2 hours before you serve. Eat and relish in how amazing this cake is.

Sweet and Salty Cake recipe from the Cooking Channel (actually from the Baked cookbook)
Italian Meringue Buttercream from Cookstr