Showing posts with label raspberry. Show all posts

Sunday, September 29, 2013

Chocolate Raspberry and White Raspberry Cupcakes

 A few weeks ago my friend at school, Courtney, celebrated her birthday. A birthday that started a new decade, so kinda a big deal, right? And she's just an awesome person so we threw a small party after school to surprise her. And I made cupcakes, obvs. When I asked her what kind of flavors she wanted, she started telling me about these white cupcakes with raspberry filling and raspberry frosting she had at a shower (baby or bridal...I can't remember). So I searched for a white cake recipe.


In searching for this recipe, I chatted quite a bit with my friend Amy who also bakes crazy delicious treats. And she also just celebrated a birthday. She's the amazing kind of person who makes homemade, from scratch cupcakes for all her coworkers. She clearly needed delicious homemade cupcakes and a small party to celebrate her birthday.  She was interested in the cupcakes I made for Courtney but wanted a chocolate cake. Easy. I used The Cupcake Projects Ultimate Chocolate Cake recipe which I've shared previously.


So I now bring to you: the moistest white cake filled with fresh raspberry purée and topped with the creamiest raspberry cream cheese frosting and the richest chocolate cake filled with fresh raspberry purée and the creamiest raspberry buttercream. Ta-da!


The filling and frosting will make enough for 18 cupcakes. Which is perfect for the chocolate cupcake recipe, but the white cake yields between 26-36, depending on how you fill your liners.


Also, the white cake utilizes a box mix. Say what?!? I know. I'm not normally that kind of gal. But the reviews for this recipe were outstanding, and even though you are using a box mix, you're not actually making a box cake. So much more goes into it that I think we can let the semi-home made part slide, right?  Right.  But if you really want to do it all yourself, try this recipe for a white cake mix from Chickens in the Road. I haven't tried it this way, but probably just make sure you have 18.25 ounces of mix when your done.


And most importantly, I think the secret for the awesome cupcakes is sour cream. They both have it. Full fat is probably the way to go, but I already had reduced fat sour cream in the fridge and I think it worked out just fine. And, IMHO,  it never hurts to save on some calories as long as flavor isn't sacrificed.

Reminder: one batch of filling and frosting will be enough for 1 batch (around 18 cupcakes) of either (not both) recipes.

Get the chocolate cupcake recipe here.


First, make the filling. It needs to set up over night, so do it at least 1 day ahead of time.


Raspberry Filling

Ingredients
2 cups frozen raspberries, thawed (with 1/4 cup sugar if they are not already sweetened)
1/3 cup sugar
1-1/4 cups water/liquid*
3-4 tablespoons of corn starch (if you plan on blending the berries up, I suggest leaning towards 3 1/2 to 4 tablespoons)
1 teaspoon lemon juice

Directions
1. After berries are thawed, *measure out the berry juice into a measuring cup. Add water up to the 1 1/4 cup line.

2. In a medium sauce pan, whisk together the sugar and corn starch. Stir in liquid and the lemon juice and heat over medium high heat until the mixture thickens, stirring constantly. Immediately remove from heat.

3. Add berries to the thickened sauce and stir together well to combine. You can stop here and use this to fill your cupcakes...

4. ...or you can purée the mixture in a blender, food processor, or using an immersion blender (my blade of choice) and strain the mixture through a small to medium mesh sieve to help remove some of the seeds (straining will greatly reduce the number of seeds but some will still sneak in).

5. Store in an air tight container in the fridge at least overnight. The purée will thicken even more as it cools.

Note: the first time I made this filling, I used 3 tablespoons of corn starch but felt that it didn't set up enough to fill cupcakes. This maybe had to do with using the immersion blender, which I think may have broken up some of the thickening bonds from the pectin in the fruit. The second time I made it, I used 4 tablespoons of corn starch and blended only until just puréed and I liked the consistency a lot better.

Next, make the cupcakes. Below, I'm sharing the white cake recipe I used for Courtney's cupcakes. You can find the chocolate recipe I used here.


White Cupcakes (yields around 24-36...I got 26)

 Ingredients
1  box white cake mix (16.25-18.25 ounces, depending on what your store carries. The original recipe calls for 18.25oz but I could only find 16.25oz so it's what I used and it turned out fine)
1 cup flour
1 cup white sugar
3/4 teaspoon salt
1 1/3 cups water
2 tablespoons vegetable oil
1 teaspoon vanilla extract
1 cup sour cream
4 large egg whites

Directions

1. Preheat oven to 325 degrees. Line cupcake pan with liners. You'll need between 24-36 liners.

2. In a large bowl or the bowl of a stand mixer, whisk to combine the cake mix, flour, sugar, and salt.

3. Add the remaining ingredients (water, oil, vanilla, sour cream, and egg whites). Start mixing on low until all the dry ingredients are wet, then increase speed to medium and mix for about 2 minutes - until everything is well combined.

4. Fill cupcake liners to about 2/3 full ( for me this was 26 cupcakes) and bake for 15 minutes (rotating after 10 if you need to). Check for done-ness with a toothpick - it should come out clean or only with a few moist crumbs stuck to it. Bake at 1 minute increments until done if needed.

5. Let cool for a minute or two in the pan, then immediately transfer to a baking rack to cool.

6. Once cool, fill the cupcakes (reserve 1/4 to 1/2 cup filling for the frosting). Core each cupcake, saving the tops. Add about 2 teaspoons of filling to each cake (don't fill to the very top, but close to it).  Slice off the bottoms of the saved tops, and re-top the cupcakes.  Either eat the cupcake middles or toss them out or turn them into cake balls with any extra frosting.

Finally make the frosting and frost the cupcakes.

 Raspberry Cream Cheese Frosting

Ingredients

Cream cheese, 8 ounces, at room temperature
1 stick of unsalted butter, room temperature, cut into tablespoons
1/4 to 1/2 cup raspberry filling from the above recipe
1 teaspoon vanilla extract
2 cups powdered sugar, more or less

Directions

 1. In the bowl of a stand mixer, cream the block of cream cheese. Add butter 1 tablespoon at a time until they are completely creamed together.

2. Add 1/4 cup of raspberry filling, cream to combine. Add vanilla extract and mix.

3. Add one cup of powdered sugar, mix to combine. Add second cup of powdered sugar and mix to combine.

4. Give it a taste test, add more raspberry purée to taste. Add more powdered sugar for a thicker consistency. Thin the frosting with milk (1 tablespoon at a time) if you want a thinner texture.

5. Mix in high until light and fluffy.

Pipe frosting onto cupcakes. You can make pretty swirls using the Wilton 1M tip or dainty ruffles using the 104 tip. Then sink your teeth into the most delectable cupcakes your taste buds have ever encountered.


 Filling recipe slightly adapted from Tidy Mom
Cake recipe from Recipe Girl

Sunday, May 5, 2013

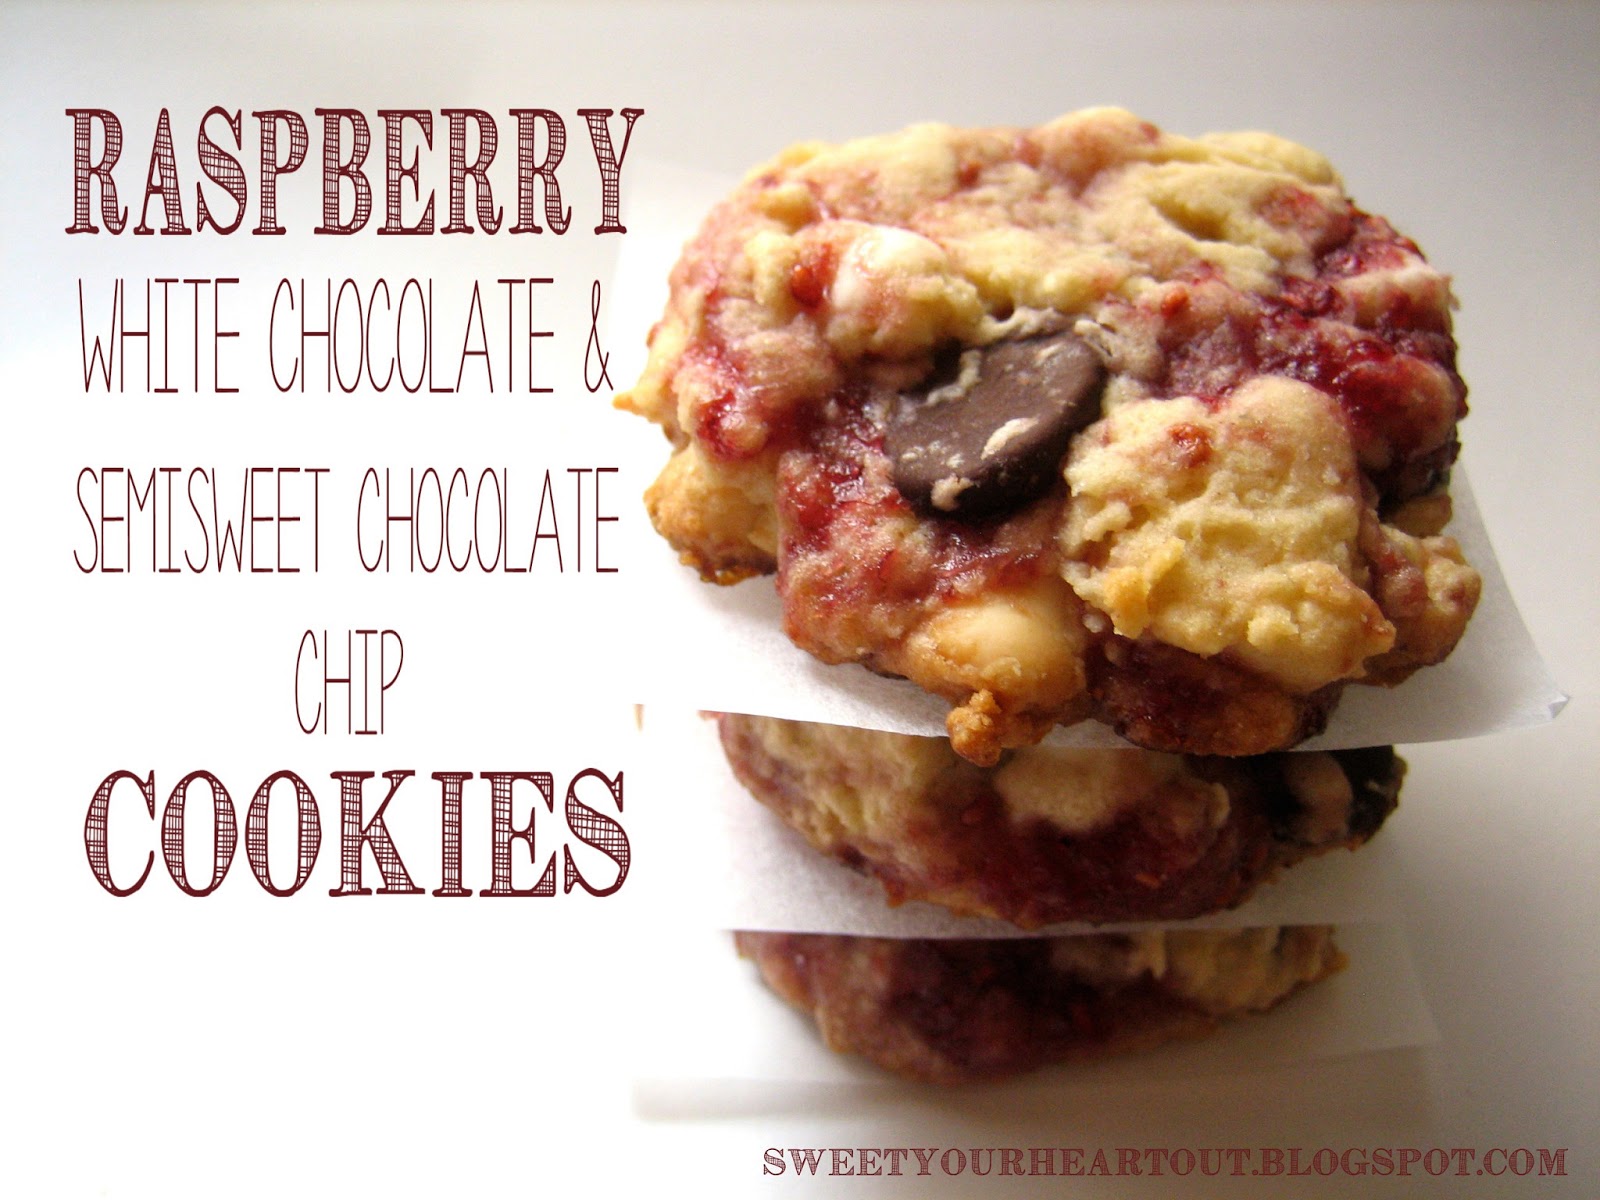
Raspberry and Chips Cookies

Difficulty: No
Time consuming: No, I made these from start to finish in under 2 hours, and most of that was because I was socializing with a friend.


The staff at my school is super cool.  So cool I can't even tell you about it for a few weeks, or else I might ruin the surprise.  But let's just say it's epic, and when I can, I'll post a video.  But while practicing all this super cool and super secret awesomeness,  I made these cookies to share.  They are apparently the cookies that are sold at Disneyland near Splash Mountain.  Since I was around 6 the last time I was there, I couldn't tell you.  But regardless, they are amazing.


The cookies are packed full of white and semisweet chocolate chips and swirled with raspberry jam.  The flavors just party together and taste amazing.  The cookies end up soft and chewy, and just a little crispy on the edges.  Basically the perfect cookie that can satisfy just about anybody.

But as a side note, these may not be the best cookies for kids. Based on meticulous research (aka polling 3 students Friday morning), these cookies got a 0/3 vote with 5th graders (they were in favor of s'more brownies). And one child tester did not care for the cookie. However, adults loved them! Even my super picky, I-dont-like-sweets-but-if-I-do-they-better be-soft-Thin-Mints (wtf?) husband likes these cookies.

I can also imagine these cookies with chopped, toasted almonds in place of (or in addition to) the chocolate chips for a more sophisticated cookie.


Yields around 40 small cookies (made with a standard tablespoon sized scoop), or 13ish extra large, bakery style cookies (made with an ice cream scoop)


Ingredients
2 1/2 cups flour
1/4 teaspoon baking soda
1/4 teaspoon baking powder
1/4 teaspoon cream of tartar
1/4 teaspoon salt
1/2 cup butter (1 stick), room temperature
1/2 cup granulated sugar
1/2 cup brown sugar
1 egg + 1 egg yolk
1 teaspoon vanilla extract
1/4 teaspoon almond extract
4 tablespoons raspberry jam (More or less to taste)
3/4 cup white chocolate chips (about half the bag)
3/4 cup semi-sweet chocolate chips (about half the bag)

Directions

1. Preheat the oven to 350 degrees. In a small bowl, whisk together the dry ingredients (flour, baking soda and powder, cream of tartar, and salt), set aside.

2. Using an electric or stand mixer, cream the butter and sugars together until light and fluffy (note: mine never became "fluffy," just mixed together). Add the egg and egg yolk, continue to mix (note: at this point, my mixture started to look a little better, so I creamed for a minute or two). Add and mix in both the vanilla and almond extracts.

3. Add in dry ingredients and mix until just combined. Make sure to scrape down the bowl as necessary (note: my cookie dough was fairly dry at this point, but I just kept on with the recipe and it turned out ok). Gently mix in the white and chocolate chips.

4. Portion about 1/4 of the dough into a small bowl. Add around a tablespoon of jam and cut it into the dough with a butter knife. Do not over mix, you want solid stripes and chunks of jam.

5. Scoop and place on cookies on parchment lined sheets. Bake for 12-17 minutes, depending on the size of your cookie (note: my small cookies took 12 minutes, I rotated the pan after 7 minutes, and when they came out, the bottoms were golden brown and the tops were still pale and their centers still soft). Let cool on cookie sheet for 5 minutes (this helps maintain the chewy texture, if you want a harder cookie, move to a cooling rack as soon as the cookies aren't too soft).

Repeat steps 4 and 5 until all the dough has been jammed and baked.

These cookies are amazing warm from the oven or with a glass of milk. While baking, my friend and I may have eaten 5. You know, strictly for scientific purposes to make sure they were good enough to share with the other teachers.

Recipe from My Baker Lady. Her pics of these cookies are really pretty, go check them out.


Sunday, February 17, 2013

Soft Lemon Sugar cookies with Raspberry Icing


Difficulty. Easy
Time consuming: about 10-15 minutes to make the dough, then an overnight chill in the fridge, then rolling out the dough and baking batches for 8 minutes at a time.


I made some sweet treats for the sweet teachers at my school this Valentine's Day. With the overload of chocolate around every corner on this holiday, I opted for a fruitier treat that was very well received.  

The cookies are soft and bursting with bright lemon flavor.  The citrus note in the cookie complimented the raspberry frosting which resulted in the perfect sweet and tart flavor combination that was out of this world!


Happy (belated) Valentines Day, everyone! What kind of sweet treats did you get to enjoy?

 The Recipe:
 yields: 18 medium heart-shaped cookies and 28 small heart-shaped cookies

Ingredients
Cookies
2 cups flour
1 tablespoon cornstarch
1 1/2 teaspoon baking powder (or 2 teaspoons if you want an even fluffier cookie)
1/2 teaspoon salt
2/3 cup butter (10 and 2/3 tablespoons), room temperature
2/3 cup white sugar
2 eggs, room temperature
zest from 1 lemon
juice from one lemon (about 1/4 cup of lemon juice)

Frosting
1/3 cup butter (5 1/3 tablespoons)
 3 cups powdered sugar
2 tablespoons Raspberry Melba Sauce (more to taste, I probably used closer to 1/4 cup)
2 tablespoons milk (optional - if you need to thin the frosting, but the raspberry sauce will do this, too)

Directions

Cookies 
1.  In a medium bowl, whisk together the flour, cornstarch, baking powder, and salt.  Set aside.

2. Cream butter in a stand mixer until light and fluffy.  Add sugar and beat until well combinedAdd eggs and lemon zest and mix until well combined.

3.  Add half of the flour mixture and mix until combined.  Add lemon juice, mix.  Add the remaining of the flour mixture and mix until well incorporated.

4.  Turn dough out onto plastic wrap, smush into a disk shape, and refrigerate for several hours or overnight.

5.  Preheat oven to 350 degrees.  Take half of the dough out and let sit at room temperature for a few minutes - just enough so that it can be rolled out without breaking or cracking too much.  Roll dough out to 1/4" thick on a well floured surface (I used a combination of flour and powdered sugar), cut into desired shapes, transfer to a baking sheet.

6.  Bake for 8 minutes.  The cookies will not spread a lot in baking, so maybe leave a 1/2" between cookies.  Cool for a few minutes on the baking sheet then transfer to a wire rack to cool completely.  The tops of the cookies will be lightly colored and the bottoms just barley mottled with a light brown.

7.  Repeat step 6 with the remaining dough.

Frosting
1.  Cream the butter in a stand mixer until light and fluffy.  Add the powdered sugar 1 cup at a time.  It will seem impossibly thick and clumpy - if this happens, either add a tablespoon of milk or a few squirts of Raspberry Melba sauce until it starts to just barely come together.  Once all the sugar has been added, add raspberry sauce and beat on high until fluffy.  If the mixture seems too thick after all the raspberry has been added, add milk 1 tablespoon at a time until the desired consistency has been reached.

2.  Using an offset spatula or knife, spread onto cookies.  Let cookies sit for a few hours until the frosting is set.  If you are going to add sprinkles, do it sooner than later, because when the frosting starts to dry, the sprinkles won't stick as well.

Of course, if after you've frosted all of your cookies and find that you have some frosting left, sandwich with vanilla wafers or some homemade chocolate wafer cookies.


And I need to thank my friend Katie from grad school who shared the base of this recipe with me :)
Katie is awesome, she was doing her clinical rotation at a nursing home and wanted to share a treat with the residents that they would not have trouble eating - a lot of the people there were on restricted diets (like mechanical soft foods only) and she wanted to share something soft that the majority of folks could eat.  Of course, I helped her eat the leftovers, because that's what good friends do.

Saturday, February 16, 2013

Raspberry Melba Sauce


Difficulty: easy
Time consuming: not at all

Raspberry Melba sauce is great in so many ways. It's tart. It's smooth. And it's bursting with tangy raspberry flavor that compliments so many dishes.

Recently, I've used it to top vanilla ice cream. The sweetness from the ice cream and the tartness from the sauce makes a great treat after dinner. My mom uses it to drizzle raspberry deliciousness on peach pie. My husband drizzled the rich red sauce on vanilla cheesecake. Last year, my mom and I whisked it into buttercream and used it to sandwich between macarons.

Which brings me to now. I made up a batch of sauce (which yields about 10 ounces) to flavor some buttercream. The Melba sauce gives buttercream a rich, sweet and tangy, raspberry flavor that is far from artificial. Another perk to using raspberry Melba sauce instead of preserves is that it strains out all the seeds so the resulting frosting is nothing but silky smooth.

The recipe

Ingredients
10 oz frozen raspberries, thawed; or 1 cup fresh raspberries
1/2 cup Red currant jelly(this is what the original recipe called for, but I bet it would be equally as tasty using raspberry, strawberry, or another jelly)
1 tablespoon water
1 1/2 teaspoon cornstarch

Directions
1. Combine water and cornstarch in a small bowl or cup to make a slurry. Set aside.

2. Combine raspberries and jelly in a medium sauce pan. Set over medium heat and stir until raspberries break down.

3. Add cornstarch slurry to raspberry. Continue to cook and stir until sauce is thickened.

4. Either refrigerate until cool then strain through a fine wire mesh sieve set over a bowl or glass measuring cup. Or if you're impatient like me, strain it immediately, just be careful because its hot. Strain sauce from seeds by stirring gently in sieve.

I stored my sauce in a squeeze bottle I bought for flooding iced sugar cookies so that I could sauce cakes, pies, and ice creams easier.

See how I used this sauce for cookies in a few days! You won't wanna miss it!!