Showing posts with label cookie. Show all posts

Monday, October 28, 2013

Chocolate Oreo Doodles


When I first saw these cookies I couldn't wait to find a reason to make them. My monthly special ed team meeting was the perfect excuse with so many chocolate lovers in attendance. 

The chocolate cookies are rich, fudgy, and chewy. They're speckled with chocolate chips and I bet would be even more incredible with the addition of roughly chopped cookies. The dough gets rolled in chocolate cookie crumbs (I used generic Oreos) which give the outside a crunchy and slightly crumbly texture. I imagine this would be good with just about any crumbled hard cookie (like thin mints, vanilla wafers, etc). 

I was thinking of renaming the cookie and calling them earthquake cookies, because when they bake the tops crack open and expose the cookie inside. I also thought of calling them dirt cookies because they remind me of the dirt pudding cups from my childhood. I decided not to rename these though with respect to the original author who posted a naming contest to her Facebook and Oreo Doodles won.

Without further ado, I bring you: Oreo Doodles

Ingredients
4 ounces of chopped bitter or semisweet chocolate, or 4oz chocolate chips
1 stick (1/2 cup) butter
1 cup flour
1/2 cup cocoa powder
1/2 teaspoon salt
1/2 teaspoon baking soda
1 1/2 cups sugar
2 eggs
1 teaspoon vanilla extract
1 cup semisweet chocolate chips
12 Oreos, finely crushed

Directions

1. Preheat oven to 325 degrees. Line baking sheets with parchment part and set aside. 

2. In a double boiler melt the  4 oz of chocolate with the butter. Or melt using the microwave method (microwave for 30 seconds on 50% power, stir, and repeat until smooth). Set aside for a few minutes to cool (but not harden)

3. In a medium bowl whisk to combine the flour, cocoa powder, salt, and baking soda. Set aside. 

4. When the chocolate is cool transfer to the bowl of a stand mixer and incorporate the sugar with the paddle attachment on low. 

5. Add eggs one at a time. Add vanilla. Mix until combined. 

6. Add half the flour mixture and stir to incorporate. Ass the remaining flour and stir on low. Mix in chocolate chips. 

(Note: at this point the dough is done but will still be very soft, that's ok)

7. Using a cookie scoop, scoop a heaping tablespoon of dough into the Oreo crumbs. Roll to evenly coat, then place on a baking sheet spaces 2" apart (the cookies will spread quite a bit during baking). 

8. Bake for 10-12 minutes, until the tops start to crack. Do not over bake. (Note: when I made these, I took them out even though hey did not look "done"

Recipe from Gimme Some Oven.

And here is her pretty picture.

Tuesday, July 30, 2013

Chocolate Chip Cookie Bars with Peanut Butter Caramel Filling

Difficult: No
Time Consuming: No


This is one of my favorite desserts to bring to events because... 1) They come together quickly.  2) The filling makes them incredible soft.  3) The caramel adds a sweetness that's tempered by the peanut butter, so it's not too sweet.  4) I can't stop eating them.

These bars are amazing.  Possibly one of my favorite things I've made this year, they're that good.  The cookie layers perfectly sandwich the peanut butter caramel middle.  To make it extra special, as I was cooking the caramel for the filling, I dropped in a vanilla bean and stirred until all the little flecks of vanilla caviar speckled the gooey filling (just make sure you take it out before you spread it over the cookie base).


This recipe makes a 13x9" pan of incredible bars.  When you're spreading the first layer of cookie into the pan, you will worry that there is no way that two-thirds of the dough will cover it.  But just keep squishing it around until you get the whole bottom covered - it will seem thin, but the layer will puff up when it bakes.  For the cookie topping, I dropped teaspoon sized dough balls all over the surface, they puff up and spread out, but still leave little windows for the silky, gooey peanut butter caramel to peak through.

The Recipe:
yields one 9x13 pan, cut into whatever size you'd like

Ingredients
 chocolate chip cookie dough
1 3/4 cups all-purpose flour
1 teaspoon baking soda
1 teaspoon salt 

5 tablespoons unsalted butter, softened at room temperature
5 tablespoons shortening (if you have a tablespoon sized cookie scoop, it makes quick measuring from a tub of shortening)
1/2 cup packed light brown sugar
1/2 cup granulated sugar
1 teaspoon vanilla
1 egg
2 cups semi sweet chocolate chips 

Peanut Butter Caramel Filling
1/2 cup (4 oz) evaporated milk
11 ounces caramels, unwrapped (you can buy Kraft Caramels, Kraft Caramel Bits, or Werther's Original Chewy Caramels - I used Werther's because someone bought out all the Kraft caramels)
1/2 cup creamy peanut butter
*optional: the caviar from 1 vanilla bean, or 1 whole split vanilla bean

1/4 cup semi-sweet chocolate chips

Optional: Coarse salt, like Kosher or Sea Salt.  You can be extra special by using vanilla sea salt if you have it.

Directions

1.  Preheat oven to 375 degrees.  Line a 9x13" pan with foil - leave enough overhang so you can lift the bars out of the pan when they're done.  Set aside.  In a medium bowl, lightly whisk flour, baking soda, and salt together, set aside.

2.  In the bowl of a stand mixer, beat butter and shortening together until combined.  Add both sugars and beat for about 2 minutes - until light and fluffy.  Add egg and vanilla, beat until combined.  Mix in chocolate chips.

3.  Add half of the flour mixture, and mix until just combined.  Then add the remaining flour mixture and mix again until just combined.

4.  Take about two-thirds of the dough and press it into the bottom of the pan.  It will seem like it won't cover, but just keep smooshing it until it covers - it will be fairly thin.  Bake for 8-10 minutes, until it's just set and hardly brown.

5.  While the base layer is baking, begin making the filling.  Unwrap caramels and place in a medium saucepan.  Add peanut butter, evaporated milk (and the vanilla bean if you are using it).  Whisk over medium heat until smooth.

6.  When the cookie base is finished (which probably happened while you were making the filling), pour the peanut butter caramel over top, and spread evenly (if you put in a whole split vanilla bean, make sure to remove it.)  Sprinkle 1/4 cup of chocolate chips (or more, I'm not judging) over the peanut butter caramel.

7.  Drop teaspoon sized dough balls over the surface of the caramel layer.  Sprinkle lightly with salt (optional) and bake for 18-20 minutes (until the cookie dough on top is lightly browned)

8.  Cool completely in pan then cut into 24 squares (or however many you want).  I chilled mine in the fridge to make cutting a little easier.


From Everyday Reading

Saturday, May 25, 2013

Cornmeal Lime Cookies

Difficulty: easy
Time consuming: no


Cinco de Mayo was almost a month ago, and was the perfect reason to make cornmeal lime cookies with a sweet lime glaze.  I meant to get these posted the week of Cinco, but then the number of IEP's and ETR's I had to write for school EXPLODED and unfortunately, posting was put on the back burner.  So sorry, y'all. Anyways, I first read about the recipe in the book Flour.  It sounded unusual but had a really intriguing description.  The cookie is soft and cake like, and just a little bit chewy.  The edges are crispy.  The lime flavor is tangy and front stage, but not over powering.


For a "margarita"-style cookie, substitute tequila for the water in the glaze.  Tequila and I have not gotten along since I was 19 and studying abroad in London.  A friend of mine was hitting on this middle age British man who kept buying us shots of tequila.  To say that was a bad night would be an understatement.  But really, if you don't hate tequila or if you like margaritas, that subtle change in the glaze is just enough to make the cookie a little more festive.

I brought these cookies to share with some teachers I saw on Cinco while we practiced for this awesome flashmob we did at Prom (I know, the coolest chaperones, lol) and they were devoured.  The little cookies got mad praises.  The link to the FlashMob video goes to Facebook, so you'll have to be logged in to see it.


Ingredients
cookies
2 cups flour
1/2 cup cornmeal
2 teaspoons baking powder
1/2 teaspoon course salt
1 cup (2 sticks) unsalted butter, room temperature
3/4 cup + 2 tablespoons sugar
2 tablespoons lime zest (from 2-4 limes)
2 large eggs
1 teaspoon vanilla extract

glaze
1 cup powdered sugar
juice from 1 lime
zest from 1 small lime
+/- 1 teaspoon water or tequila

Directions

1.  Preheat oven to 350 degrees.  Line a baking sheet with parchment paper.  In a medium bowl, whisk together flour, cornmeal, baking powder, and salt; set aside.

2.  In a stand mixer, cream the butter and sugar together.  Add the lime zest and mix to combine.  Add eggs one at a time, scraping down the bowl as necessary.

3.  Add the flour mixture to the stand mixer and mix until just combined.  (Note: my dough was pretty sticky at this time, but I just let it be)

4.  Roll cookie dough into 1" balls (I used my 1-tablespoon-sized cookie scoop) and place 1-2" apart on baking sheet.  Gently press each ball with the palm of your hand to flatten slightly.

5.  Bake for 16-20 minutes, until the bottoms are golden and mottled brown, and the tops are still pale.  DO NOT OVER BAKE.  Let cool on the sheet pan for 15 minutes (this helps maintain a chewier texture), then transfer to a cooling rack to cool completely.

6.  In a small bowl, whisk together the powdered sugar, lime zest, and lime juice.  Add water or tequila 1 teaspoon at a time until you reach a consistency you want (for me this was only 1 teaspoon of water).  The glaze should be thin enough to spread over the cookies.

7.  Place a spoonful of glaze over the cookies and let it run down the sides.  (Note: I put wax paper under my cooling rack and glazed the cookies on that).  Let the glaze harden before serving (I gave it about 1 hour)

Cookies taste great day of, but can be stored in an airtight container for a few days (if they even last that long).

From Completely Delicous

Sunday, May 5, 2013

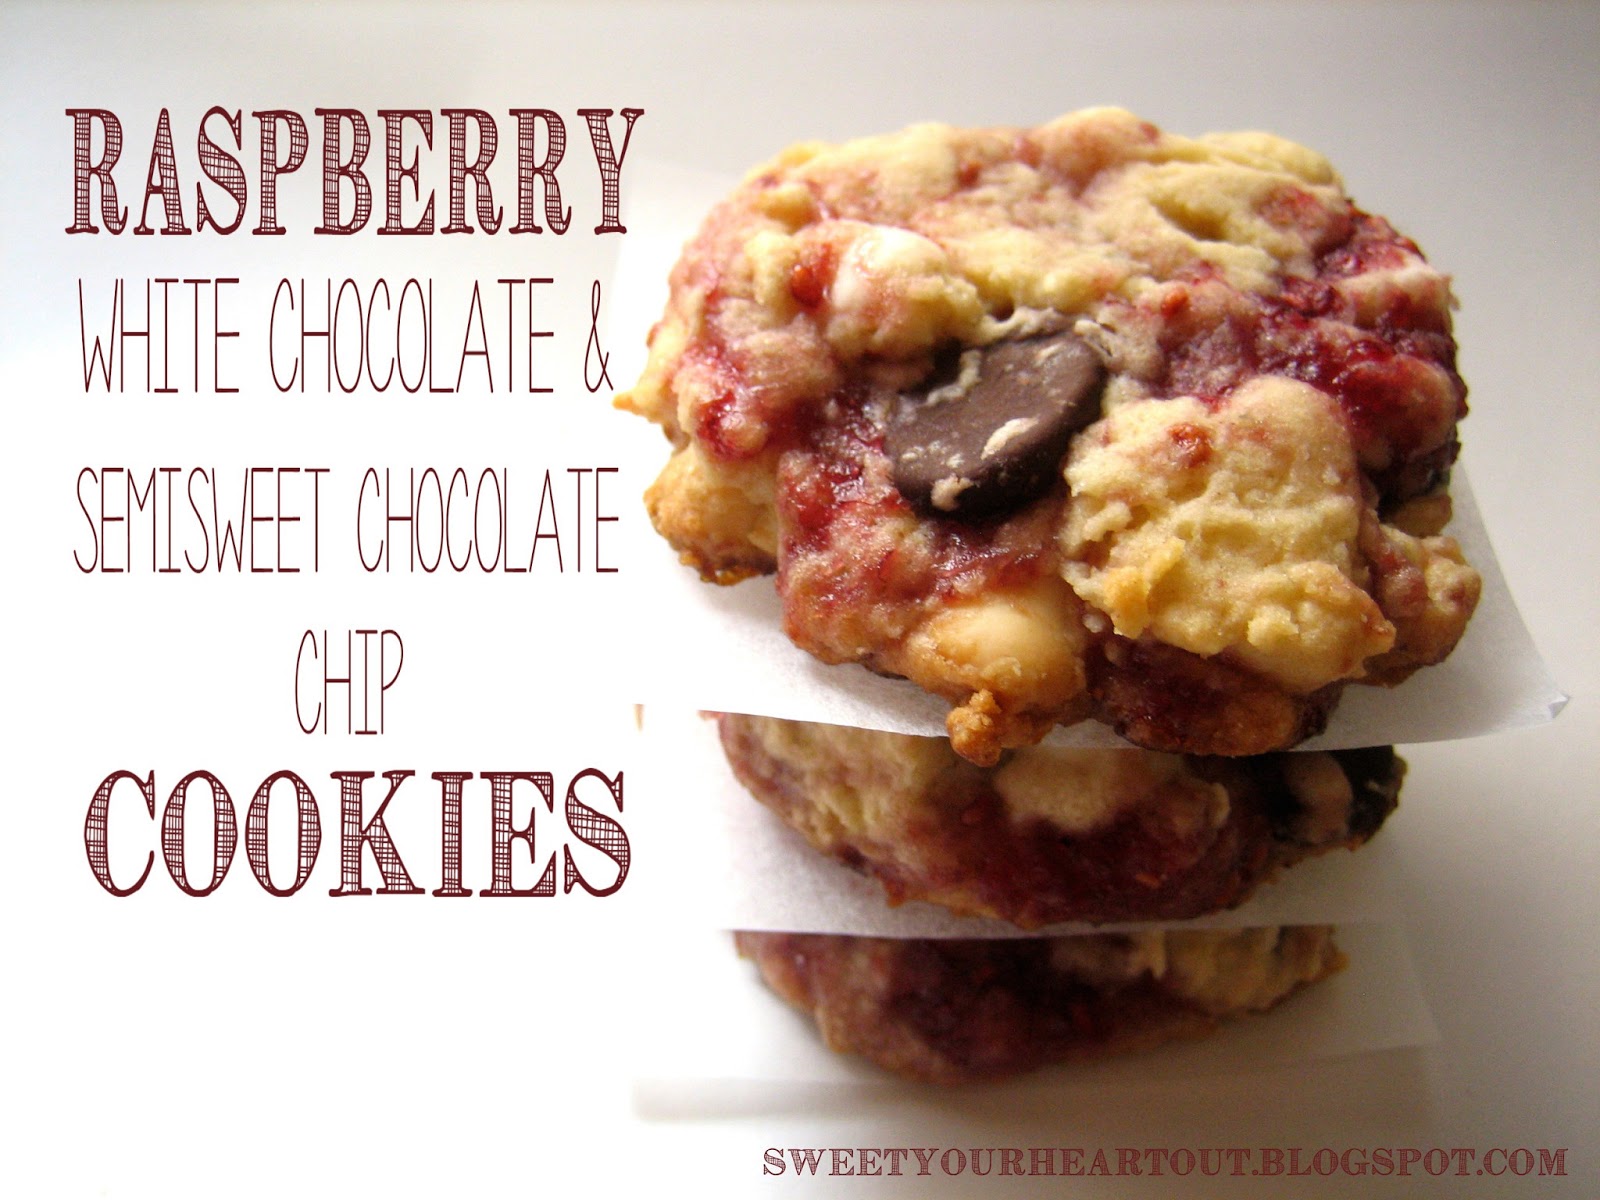
Raspberry and Chips Cookies

Difficulty: No
Time consuming: No, I made these from start to finish in under 2 hours, and most of that was because I was socializing with a friend.


The staff at my school is super cool.  So cool I can't even tell you about it for a few weeks, or else I might ruin the surprise.  But let's just say it's epic, and when I can, I'll post a video.  But while practicing all this super cool and super secret awesomeness,  I made these cookies to share.  They are apparently the cookies that are sold at Disneyland near Splash Mountain.  Since I was around 6 the last time I was there, I couldn't tell you.  But regardless, they are amazing.


The cookies are packed full of white and semisweet chocolate chips and swirled with raspberry jam.  The flavors just party together and taste amazing.  The cookies end up soft and chewy, and just a little crispy on the edges.  Basically the perfect cookie that can satisfy just about anybody.

But as a side note, these may not be the best cookies for kids. Based on meticulous research (aka polling 3 students Friday morning), these cookies got a 0/3 vote with 5th graders (they were in favor of s'more brownies). And one child tester did not care for the cookie. However, adults loved them! Even my super picky, I-dont-like-sweets-but-if-I-do-they-better be-soft-Thin-Mints (wtf?) husband likes these cookies.

I can also imagine these cookies with chopped, toasted almonds in place of (or in addition to) the chocolate chips for a more sophisticated cookie.


Yields around 40 small cookies (made with a standard tablespoon sized scoop), or 13ish extra large, bakery style cookies (made with an ice cream scoop)


Ingredients
2 1/2 cups flour
1/4 teaspoon baking soda
1/4 teaspoon baking powder
1/4 teaspoon cream of tartar
1/4 teaspoon salt
1/2 cup butter (1 stick), room temperature
1/2 cup granulated sugar
1/2 cup brown sugar
1 egg + 1 egg yolk
1 teaspoon vanilla extract
1/4 teaspoon almond extract
4 tablespoons raspberry jam (More or less to taste)
3/4 cup white chocolate chips (about half the bag)
3/4 cup semi-sweet chocolate chips (about half the bag)

Directions

1. Preheat the oven to 350 degrees. In a small bowl, whisk together the dry ingredients (flour, baking soda and powder, cream of tartar, and salt), set aside.

2. Using an electric or stand mixer, cream the butter and sugars together until light and fluffy (note: mine never became "fluffy," just mixed together). Add the egg and egg yolk, continue to mix (note: at this point, my mixture started to look a little better, so I creamed for a minute or two). Add and mix in both the vanilla and almond extracts.

3. Add in dry ingredients and mix until just combined. Make sure to scrape down the bowl as necessary (note: my cookie dough was fairly dry at this point, but I just kept on with the recipe and it turned out ok). Gently mix in the white and chocolate chips.

4. Portion about 1/4 of the dough into a small bowl. Add around a tablespoon of jam and cut it into the dough with a butter knife. Do not over mix, you want solid stripes and chunks of jam.

5. Scoop and place on cookies on parchment lined sheets. Bake for 12-17 minutes, depending on the size of your cookie (note: my small cookies took 12 minutes, I rotated the pan after 7 minutes, and when they came out, the bottoms were golden brown and the tops were still pale and their centers still soft). Let cool on cookie sheet for 5 minutes (this helps maintain the chewy texture, if you want a harder cookie, move to a cooling rack as soon as the cookies aren't too soft).

Repeat steps 4 and 5 until all the dough has been jammed and baked.

These cookies are amazing warm from the oven or with a glass of milk. While baking, my friend and I may have eaten 5. You know, strictly for scientific purposes to make sure they were good enough to share with the other teachers.

Recipe from My Baker Lady. Her pics of these cookies are really pretty, go check them out.


Friday, March 1, 2013

Chocolate Chip Cookie Dough Cupcakes


Difficult: Not really
Time consuming: A bit, there are 3 components to these tasty treats


Let's get one thing straight: cookie dough is amazing.  I could eat it straight from the bowl; all day, every day.  But then my pants wouldn't fit, and that'd be bad.  Also the whole don't-eat-raw-eggs thing.  For real, don't eat raw eggs.  I used to reside in the camp of "I never get sick from eating batter/dough/etc," until I got sick (not from this recipe).  It's totally not worth it so don't eat raw eggs.

Luckily for you, and for me, these cookie dough cupcakes are completely safe to eat and taste exactly like cookie dough.


I slightly adjusted the cake recipe to include browned butter which brings out a slight nuttiness.  You don't have to brown the butter, but I really liked the nuance of flavor it added.  However, after I browned the butter (and maybe turned my back from it for only a second), I noticed some browned bits and I didn't want them speckling the cupcake, so I strained it through a coffee filter.  I also adjusted the bake time and temperature - starting the oven at 350 degrees and then reducing it to 325 as soon as the cupcakes went in.  Then I baked them for 20 minutes.


Like most cupcakes I make, this was a two day process. I made the cupcakes and cookie dough first. On the second day I made the frosting, assembled the cupcakes, and garnished so they were pretty.

These cupcakes went with my husband to the church fish fry where he volunteers on Friday's during Lent.  I work out with my trainer on Friday afternoons but am happy to spend my afternoons/evenings on Thursdays whipping up tasty treats for the bake sale there.
Ha ha ha :)

The recipe
Yields 24 standard sized cupcakes and 10 mini cupcakes.

Ingredients
cupcakes
2 2/3 cups all-purpose flour
1 teaspoon baking powder
1 teaspoon baking soda
¼ teaspoon salt
3 sticks unsalted butter, room temperature
1½ cups light brown sugar, packed
4 large eggs
1 cup milk
2 teaspoon vanilla extract
1 cup chocolate chips (semi- or bittersweet) - optional - I might leave these out next time I make them since they sank to the bottom of the cake anyways.

Cookie dough filling
4 tablespoons (half of a stick) unsalted butter, at room temperature
6 tablespoons. light brown sugar, packed
1 cup plus 2 tablespoons all-purpose flour
7 oz. sweetened condensed milk (half of a can)
½ teaspoon vanilla extract
¼ cup mini semisweet chocolate chips

Frosting
2 sticks unsalted butter, at room temperature
½ cup light brown sugar, packed
2 1/3 cups powdered sugar
2/3 cup all-purpose flour
½ teaspoon salt
2 tablespoon milk
2 teaspoon vanilla extract

Garnish (optional, but pretty)
Tiny chocolate chip cookies
Mini chocolate chips

Directions

cupcakes
1.  Preheat oven to 350 degrees.  Line 24 standard size muffin cups with liners and set aside.  In a medium bowl, whisk together the flour, baking powder, baking soda, and salt.  Set aside.

2.  Optional: brown 1 stick of butter in a saucepan - put butter in saucepan set to medium, stir frequently until the butter takes on a dark browned color.  If you accidentally end up with some browned bits,  strain through a coffee filter.  Set into the fridge to cool a little while you continue to work.

3.  In the bowl of a stand mixer, cream the butter (2 sticks unless you've chosen not to brown a stick, then it's all 3) with the brown sugar until light and fluffy.  Add vanilla and eggs 1 at a time, mixing thoroughly between each addition.

4.  Add 1/3 of the flour mixture to the butter mixture, and mix until combined.  Then add half of the milk, mix.  Then add the second 1/3 of the flour mixture, mix.  Then the second half of the milk, mix.  Then the remaining 1/3 flour mixture, mix.  At this point, all the milk and flour should be mixed in.  If using chocolate chips, fold them in now.

5.  Fill cupcake tins about 2/3 of the way full.  After I filled 24, I still had enough batter for 10 mini cupcakes.  Put cupcake in the oven, reduce oven temperature to 325 degrees, and bake for 20 minutes, or until the tops spring back slightly when pressed.  Let cool in pan for 5 minutes, then transfer to wire rack to cool completely.

Make the cookie dough filling
6.  In the bowl of a stand mixer, combine brown sugar and butter.  Add flour, milk, and vanilla, and mix until well combined.  Stir in chocolate chips.  Wrap in plastic wrap and refrigerate for at least an hour, or overnight.

Make the frosting
7.  In the bowl of a stand mixer, beat butter and brown sugar until mixed.  Add salt and powdered sugar and mix on low.  Add flour (1/2-2/3 cup, this really makes it taste like cookie dough - I was hesitant to include this but it was awesome).  Then milk and vanilla.  Whip on high speed for a few minutes until the mixture becomes fluffier.

Assemble
8.  Cut a hole into the cupcakes using a cupcake plunger or the cone method.  Set holes/tops aside.

9.  Roll cookie dough into 24 equal sized balls.  Split the dough in half, then split each half in half.  Split each piece into 6 equal parts and roll into balls.  Ta-da, you know have 24 even sized dough balls.  Put one dough ball into each cupcake.  Cut the bottom of the cone/cupcake hole off, and place the top back into the cupcake.  Check out Baking Bites for a better description on how to do this, complete with pictures.

10.  Put the frosting in a piping bag fit with whatever tip you'd like to use.  Top the cupcakes, then garnish with mini chocolate chips and a mini chocolate chip cookie.


Basically, there are two camps for cookie dough filled cupcakes.  The first is what I've done: make a cake, core and fill with dough, then frost.  The second has you make the cookie dough a day ahead of time and freeze cookie dough balls overnight, then add the frozen dough balls to the cupcake batter and bake until the cakes are done.  The problem with this is that you run the risk of baking the cookie dough in the cupcake.  Also it requires more time since you have do make the dough ahead of time.  If anyone has had success with the latter method, let me know how you did it and how it worked out for you! :)

Slightly adapted from Annie's Eats.

Sunday, February 17, 2013

Soft Lemon Sugar cookies with Raspberry Icing


Difficulty. Easy
Time consuming: about 10-15 minutes to make the dough, then an overnight chill in the fridge, then rolling out the dough and baking batches for 8 minutes at a time.


I made some sweet treats for the sweet teachers at my school this Valentine's Day. With the overload of chocolate around every corner on this holiday, I opted for a fruitier treat that was very well received.  

The cookies are soft and bursting with bright lemon flavor.  The citrus note in the cookie complimented the raspberry frosting which resulted in the perfect sweet and tart flavor combination that was out of this world!


Happy (belated) Valentines Day, everyone! What kind of sweet treats did you get to enjoy?

 The Recipe:
 yields: 18 medium heart-shaped cookies and 28 small heart-shaped cookies

Ingredients
Cookies
2 cups flour
1 tablespoon cornstarch
1 1/2 teaspoon baking powder (or 2 teaspoons if you want an even fluffier cookie)
1/2 teaspoon salt
2/3 cup butter (10 and 2/3 tablespoons), room temperature
2/3 cup white sugar
2 eggs, room temperature
zest from 1 lemon
juice from one lemon (about 1/4 cup of lemon juice)

Frosting
1/3 cup butter (5 1/3 tablespoons)
 3 cups powdered sugar
2 tablespoons Raspberry Melba Sauce (more to taste, I probably used closer to 1/4 cup)
2 tablespoons milk (optional - if you need to thin the frosting, but the raspberry sauce will do this, too)

Directions

Cookies 
1.  In a medium bowl, whisk together the flour, cornstarch, baking powder, and salt.  Set aside.

2. Cream butter in a stand mixer until light and fluffy.  Add sugar and beat until well combinedAdd eggs and lemon zest and mix until well combined.

3.  Add half of the flour mixture and mix until combined.  Add lemon juice, mix.  Add the remaining of the flour mixture and mix until well incorporated.

4.  Turn dough out onto plastic wrap, smush into a disk shape, and refrigerate for several hours or overnight.

5.  Preheat oven to 350 degrees.  Take half of the dough out and let sit at room temperature for a few minutes - just enough so that it can be rolled out without breaking or cracking too much.  Roll dough out to 1/4" thick on a well floured surface (I used a combination of flour and powdered sugar), cut into desired shapes, transfer to a baking sheet.

6.  Bake for 8 minutes.  The cookies will not spread a lot in baking, so maybe leave a 1/2" between cookies.  Cool for a few minutes on the baking sheet then transfer to a wire rack to cool completely.  The tops of the cookies will be lightly colored and the bottoms just barley mottled with a light brown.

7.  Repeat step 6 with the remaining dough.

Frosting
1.  Cream the butter in a stand mixer until light and fluffy.  Add the powdered sugar 1 cup at a time.  It will seem impossibly thick and clumpy - if this happens, either add a tablespoon of milk or a few squirts of Raspberry Melba sauce until it starts to just barely come together.  Once all the sugar has been added, add raspberry sauce and beat on high until fluffy.  If the mixture seems too thick after all the raspberry has been added, add milk 1 tablespoon at a time until the desired consistency has been reached.

2.  Using an offset spatula or knife, spread onto cookies.  Let cookies sit for a few hours until the frosting is set.  If you are going to add sprinkles, do it sooner than later, because when the frosting starts to dry, the sprinkles won't stick as well.

Of course, if after you've frosted all of your cookies and find that you have some frosting left, sandwich with vanilla wafers or some homemade chocolate wafer cookies.


And I need to thank my friend Katie from grad school who shared the base of this recipe with me :)
Katie is awesome, she was doing her clinical rotation at a nursing home and wanted to share a treat with the residents that they would not have trouble eating - a lot of the people there were on restricted diets (like mechanical soft foods only) and she wanted to share something soft that the majority of folks could eat.  Of course, I helped her eat the leftovers, because that's what good friends do.

Tuesday, January 29, 2013

Chocolate, Coffee, and Toffee Birthday Cake


Difficult: Parts of it
Time consuming: yea, it's a layer cake with lots of homemade components


My birthday was last week and we had a few friends over to drink, watch college basketball, play cards, and of course eat cake.

I spent weeks putting together the perfect birthday cake.  I looked over dozens of different recipes to pull this all together.  From different chocolate cake recipes, to coffee buttercreams, crunchy fillings, caramels.......My mind probably went at least 4 different routes before deciding to make a cake inspired by one of my favorite ice creams: Ben and Jerry's Toffee Heath Bar Crunch.

The chocolate cake I made was from the book Baked (there are 3 of them, all of which I highly recommend, but I don't remember which one this came from, but it was the Sweet & Salty Cake from their cookbook).  It turned out a little dry which was due to overbaking on my part - I have a very temperamental oven.  The batter is split between 3 cake pans and I had to put 2 on one rack and 1 on the other.  After the recommended baking time, all 3 of my cakes were still very wet in the middle.  After about 5 more minutes, they were still a bit "batter-y," so I did another few minutes.  Then they were pushing dry.  Boo.  In the future, I think I will stick to Bakerella's chocolate cake recipe since I made it once and didn't botch it.

I made a coffee flavored Italian meringue buttercream.  I highly recommend Italian buttercream, even though it's a little more work than traditional American style - you have to cook sugar but don't let that scare you away.  The texture is so smooth - my husband always complains that American buttercream tastes "flour-y."  But not this.  And because you use cooked sugar instead of a bag of powdered sugar, the resulting flavor isn't cloyingly sweet.

In this cake, I wanted to include a crunchy aspect, since Ben & Jerry's Coffee Heath Bar Crunch is full of crunchy bits of toffee.  And I don't know if it was because I was already thinking about ice cream and cake, or if something I saw on Pinterest lodged itself to the back of my mind, but I decided to make the crunchies from Dairy Queen cakes to put in between the layers.  And toffee, too, of course.  Then because I was thinking about ice cream cake, I threw in a layer of fudge ice cream topping, too.

This is probably a multi-day project.  It was for me at least.  I made the chocolate wafer cookies used for crunchies a few days ahead of time, made the chocolate cake the day before I planned to serve the cake, and made the frosting and assembled the cake the morning I planned to serve it.  It can most certainly be done in 1 day, but I got antsy and started making the parts early.

It's a birthday cake.  By no means low calorie.  Definitely an indulgence.  Totally worth all the work. 

The Recipe:

Ingredients:
Cake
3/4 cup cocoa powder
2/3 cup sour cream
1 and 1/4 cup hot water (hottest from the tap is fine)
3/4 cup unsalted butter, room temperature (1 and 1/2 sticks)
1/2 cup vegetable shortening (like Crisco)
1 and 1/2 cups white granulated sugar
1 cup brown sugar
2 and 2/3 cup all purpose flour, plus extra for dusting the pans
2 teaspoons baking powder
1 teaspoon baking soda
1/2 teaspoon salt
3 large eggs
1 tablespoon pure vanilla extract

Italian meringue buttercream, coffee flavored
5 large egg whites
10 ounces (1 and 1/4 cup) white granulated sugar, separated
1/4 cup cold water
4 sticks (1 pound) unsalted butter
2-3 tablespoons instant espresso powder, mixed with equal parts warm water 'til dissolved

filling
1 jar of fudge ice cream topping
half of a bag (more or less, I didn't measure) of crushed toffee bits (either Heath or Skor; can be found in the baking aisle by the chocolate chips)
1/4 of a baked recipe (9 ounces) of chocolate wafer cookies or 2 rows of Oreo cookies from a standard Oreo package
1 7.25 ounce bottle of magic shell ice cream topping (found by other ice cream condiments)

Directions:
Cake
1. Cut 3 rounds of parchment to fit the bottom of an 8 inch round cake pan.  Spray the pan with nonstick cooking spray, put in a round of parchment, spray again, then dust with flour to evenly coat.  Repeat with the other 2 pans and set aside.  Preheat the oven to 325 degrees.

2.  In a small bowl, combine the sour cream, hot water, and cocoa powder.  Whisk to combine and set aside.

3. Combine the butter, shortening, and sugars in the bowl of a stand mixer and mix with the paddle attachment until fluffy and ribbon-like.  While that's going,in a separate bowl, whisk to combine the flour, baking soda, baking powder, salt; set aside.  Going back to the butter and sugar - add eggs 1 at a time, mix until combined, add vanilla, and mix until combined.

4.  Add flour mixture to the sugar in 3 additions, alternating with the sour cream mixture, beginning and ending with the flour.

5.  Spread evenly between the 3 cake pans.  Bake for 35-40 minutes, or until a toothpick inserted in the center comes out with a few moist crumbs.  Rotate during baking.  When the cakes are done, let cool in the pans on a baking rack for 20-30 minutes.  Run a knife around the edges, flip out of pans, and let cool on baking racks completely.

*The cake can (and probably should) be made at least a day ahead of time.  Once cooled, wrap in plastic wrap and refrigerate.  "Cold" cakes are easier to slice, which you'll need to do to even the tops before stacking.

Icing
6. In the bowl of a stand mixer fitted with the whisk attachment, whisk the egg whites on high speed until you get stiff peaks.  Don't over beat, you don't want them to be dry.  Once you get to stiff peaks, slowly add 1/4 cup of sugar in a steady stream to the running mixer.  This is a meringue.

7.  While the egg whites are whisking, gently stir1 cup of sugar with 1/4 cup of water in a 1-quart, heavy bottomed sauce pan.  Heat until the sugar syrup reaches 245 degrees on a candy thermometer.  Don't stir while this is happening.

8.  Once the sugar has reached 245 degrees remove from heat briefly and let the bubbles subside. The meringue should be ready (egg whites whipped, sugar added, stiff but not dry peaks) by now, if not, finish up.  With the mixer on medium to high speed, slowly stream the sugar syrup into the meringue (try to get between the whisk and the bowl - if you hit the whisk you'll end up with hard, spun sugar all around you bowl and not mixed into your meringue).  Whisk on high for 6-10 minutes, until the bowl is cool to the touch (if the mixture is too hot when you add the butter, the butter will melt - not the end of the world but a pain in the butt for sure).

9.  Once the meringue has cooled, continue to whisk on medium to high and add butter, 1 tablespoon at a time.  The mixture may separate and look like scrambled eggs, but just keep going, keep mixing, it will come back together.

10.  Once all the butter has been added, decrease the mixer speed and add the 2-3 tablespoons of instant espresso liquid (more or less to taste).  Increase mixer speed until everything is completely incorporated and the frosting is smooth.

Filling
11.  Take 9 ounces of prepared wafer cookies and crush (either in a bag with a rolling pin or in a food processor).  The cookies should be in small chunks, not fine like sand.  Mix with the bottle of magic shell and set aside.

Set aside both the ice cream fudge filling and bag of toffee bits.

Assemble and decorate
12.  Pull the cakes out of the fridge and level the tops.  Put a dollop of buttercream on a cake stand and center the bottom layer of cake on it.  Make sure it's where you want it to be, you won't be able to move it once you get started.  (*Note: I put my cake stand on a lazy susan so that I can spin the cake while frosting and decorating)

13.  Melt the jar of fudge ice cream topping per directions on the label.  Spoon out about 1/3 of the fudge on the cake and spread evenly to the edges.

14.  Put half of the wafer concoction on the fudge and spread evenly.  Add about 1/4 of toffee bits (more or less to taste, I didn't really measure).  Gently press into the fudge.

15.  Spread a thick (but not too thick) layer of coffee buttercream over the cookies and toffee.  Spread to the edges.

16.  Add the next cake, repeat steps 13-15.  Then top with the last cake.

17.  Crumb coat the entire cake by putting a thin layer of frosting over the tops and sides of the cake.  Refrigerate for at least 1 hour.

18.  Frost the cake however you'd like.  I gave the top a nice layer of frosting, then put the rest in a bag fitted with a large round tip.  I dotted 6 large dots up the side of the cake, then used an offset spatula to pull the dot sideways.  Then added 6 more dots vertically over the frosting I pulled from the first set of dots, then pulled them sideways.  And repeat, repeat, repeat, until the side of the cake is frosted. I kinda got stuck at the very end when the last row of dots met the first, so I just stuck that in the back.  The My Cake School blog has a good tutorial with pictures on how to do this technique.

19.  Refrigerate the cake.  Pull out of the fridge at least 2 hours before you serve.  Eat and relish in how amazing this cake is.


 Sweet and Salty Cake recipe from the Cooking Channel (actually from the Baked cookbook)
Italian Meringue Buttercream from Cookstr

Sunday, January 27, 2013

Chocolate Wafer Cookies


Difficult: Nope
Time consuming: About 10 minutes to whip up the dough, about an hour chillin' in the fridge, then 12 minutes per round of baking.


These chocolate wafer cookies are the cookies you can use to make a variety of yummy things with.  For starters, whip these up if you want a great icebox cake (the Nabisco box of chocolate wafers can be hard to find and is kinda pricey).  Or fill them with an Oreo cream frosting for copy-cat Oreo's.  The rich chocolate taste pairs well with almost anything (like home made marshmallow fluff or peanut butter buttercream, just to name a few...I did have to try the cookies, just to make sure they weren't accidently poisoned or anything.  At least that was always the excuse growing up).

Or you can make them for the same reason I did: ice cream crunchies.  Ya know, that amazing crunchy layer in Dairy Queen or Carvel ice cream cakes.  Yea, those.  Except I'm making my crunchies to put in between the layers of my birthday cake, which is gonna be a doozy :P

Note: this recipe yields about 20 ounces of finished cookies. A typical nabisco box is 9 ounces, so halve the recipe if you are following an ice box cake recipe that calls for a box of wafers. If you are making them to put in between layers of birthday cake (like I did), you can quarter the recipe and have just enough. But extra cookies never hurt anyone :)  Also, this dough is egg free, so if you happen to eat some, well, accidents happen :P

The Recipe:


Ingredients
6.75 ounces all-purpose flour (1 1/2 cups)
2.4 ounces unsweetened cocoa powder (3/4 cup) (I used Kroger brand because it was what I had on hand and I thought they tasted super, but better quality cocoa powder like Valrhona will produce better chocolate tasting cookies since chocolate is the star flavor)
1 1/8 c sugar
1/4 t salt
1/4 t baking soda
14 T (1 3/4 sticks) unsalted butter, slightly softened
3 T milk
1 t pure vanilla extract

Directions
1. In the bowl of a food processor or stand mixer, pulse or stir together the flour, cocoa powder, sugar, salt, and baking soda.

2. Cut the butter into tablespoon sized chunks and add them to the bowl. Pulse or stir (with the paddle attachment) until the butter is in pea sized chunks (this will take a little longer in the stand mixer, and you shouldn't mix faster than the lowest speed or you will poof flour everywhere).

3. Add the milk and vanilla in a steady stream to the running processor or mixer. Continue to mix until the dough clumps around the blade or paddle.

4. Transfer the dough to a work surface and knead a few times so that all the flour is evenly mixed in and the dough ball is cohesive. Roll the dough into a log no smaller (bigger?) than 14 inches long and about 1 3/4 inch wide. I wanted smaller cookies so I rolled mine to about 24 inches long. Wrap in wax paper or plastic wrap and refrigerate until firm, at least 1 hour.

5. Preheat the oven to 350 degrees and have the racks positioned in the upper and lower thirds. Line the baking sheets with parchment paper. Cut the log of dough into slices no thicker than 1/4 inch, but thinner if you'd like. Place 1 inch apart on baking sheet and bake for 12 minutes. Rotate the pans front to back, top to bottom, halfway through baking.

6. Cool the cookies on the baking sheets for 4-5 minutes, then transfer to baking racks. If the cookies aren't crisp when cooled, put them back into the oven for a few minutes. They should not be soft when cooled.

Store in an airtight container for 2 weeks or freeze.


To make the ice cream crunchies, crush 9 ounces of cookies (about half of the above recipe) and mix with one 7.25 ounce bottle of magic shell.  Don't make this ahead of time, because once the magic shell hardens on the cookie, that's it, that's the shape you're stuck with.  Although I haven't tried it, I suppose you could just microwave it 'til the magic shell softens then you can reshape it.

And if you wanna be even more extra special, you can home make your magic shell.

Also, I had leftover crunchies after I put them in my cake, so I pressed them into muffin tins to make "cookies."  I popped them in the fridge to harden, then stored in a bag in the freezer.  They are great to eat out of hand or served with a dish of ice cream!


Chocolate wafer cookie recipe from Smitten Kitchen.

Sunday, December 16, 2012

A Softer Cut Out Sugar Cookie


Difficult: Not really
Time consuming: less so than other cut out cookies because the dough does not need to chill.

I have a go to sugar cookie recipe.  It's awesome.  The cookies cut out and bake up beautifully.  But they are a hard cookie.  And husband does not like hard cookies.  He likes soft cookies, so this holiday season I scoured the internet for a softer cut out sugar cookie.

I found a great recipe but it called for a lot of baking powder.  Baking powder = spreading cookies.  You might get something that looks like this:

Funny!
Picture from Pinterest.  Source.
I tweaked the recipe and am very pleased with it.  The cookie is not as hard as the ones of Christmas' past, but is hard enough to hold its shape while baking and take royal icing like a champ.  Don't be confused, this won't make a bakery style cake cookie.  But you will get a great softer cut out sugar cookie that can be used for all cut-out cookie occasions.  I think the secret to this cookie being a softer cut-out is that it uses powdered sugar instead of white sugar.  Just a guess, though.

The Recipe:

Ingredients:
2 sticks (1 cup) of unsalted butter, softened
1 1/2 cups powdered sugar
1 egg
2-3 teaspoons extract (I used homemade vanilla)
2 1/2 - 2 3/4 cup all purpose flour
1/4 teaspoon baking powder (you can reduce this or leave it out if your cookies have more complicated shapes)
1/4 teaspoon salt

Directions:

1. Preheat oven to 400 degrees.  Line a baking sheet or two with parchment paper and set aside.  Whisk flour, baking powder, and salt together in a medium bowl, set aside.

2.  Cream the butter and the sugar together until just combined (over beating will incorporate more air which will cause cookies to spread more when baking).

3.  In a small bowl, whisk together the egg and flavoring (mixing the egg now will ensure you don't over beat later).  Add to the butter/sugar and mix until just combined.

4.  Add the flour mixture to the butter/egg/etc in increments.  Stirring in between until the flour is moistened.  (Again we are trying to avoid over-beating the dough).  Once all the flour has been added, let the dough rest for a few minutes (I use this time to do a few dishes).

5.  Place a sheet of parchment out on your table, plop the dough onto it, flour the top, and roll the dough out to about 1/4" thick.  Cut out shapes and transfer to prepared baking pan.

6.  Bake for 6-8 minutes, until the bottoms just start to turn golden (the tops should not brown at all).

7.  Let cool for a few minutes on the pan, then transfer to a cooling rack.

8.  After the cookies have cooled, decorate however you wish.


I usually wait a day or so to decorate.  And I like to use royal icing, which I will post about very soon.

These cookies also freeze very well as long as they're stored in a airtight container.  I baked my cookies one weekend, then froze them for a week before I pulled them out to ice them.

Recipe adapted from The Adventures of Sweet Sugar Belle.

Tuesday, December 4, 2012

Cut Out Sugar Cookies

Difficulty: Easy
Time consuming: yah.


Sugar cookies are great all year around.  Especially when you have the Wilton 100 piece cookie cutter set and have pretty much every cookie cutter you'll ever need.  But I especially love making cut out cookies for Christmas.  This recipe makes tasty sweet cookies.  The cookies themselves are a hard cookie, and the icing dries to a hard shell.  They're awesome and this has been my go-to recipe for the last 5 years or so.

The cookie recipe comes from and old girlfriend of my brother's and halves or doubles nicely.  I recommend turning this into a multiday process.  First making the dough (then chilling overnight).  Then cutting out and baking the cookies.  Then decorating.  Since the cookies are hard, they can stay out at room temperature without going stale.


 Sugar Cookies
Cookies

Ingredients:
2 cups AP flour
1/4 teaspoon salt
1 1/2 sticks unsalted butter, room temperature
3/4 cup white/granulated sugar
1 egg
1 teaspoon vanilla extract

Directions:
1.  Cream butter and sugar until combined.  Don't over cream or you will incorporate too much air and your cookies may loose their shape when baked.

2.  Add eggs and vanilla and mix until well combined.  Add flour and salt, and mix until fully incorporated.

3.  Split dough into two chunks.  Flatten each chunk into a disc and wrap with plastic wrap.  Refrigerate at least 1 hour if not overnight.

4.  Preheat oven to 325 degrees.  Prepare baking sheets with parchment paper and set aside.

5.  Roll out dough on a heavily floured surface about 1/4" thick.  Cut into shapes and transfer to prepared baking sheets.  Bake for 13-15 minutes until the bottoms become mottled and golden.  Let cool on cookie sheet for a few minutes, then transfer to a wire rack to cool completely. 

Icing

Ingredients:
3 cups of powdered sugar
2 egg whites or prepared equivalent of egg white powder (aka meringue powder)
1/4 teaspoon salt
1 tablespoon lemon juice

Directions: 
1.  Combine all ingredients in a bowl and mix with an electric mixer until well blended and smooth.

2.  Separate and dye with gel (my preference) or liquid food coloring for as many colors as you want. 

The Adventures of Sweet Sugar Belle has some awesome tutorials about piping and flooding with royal icing.  I could reiterate it all here, but why reinvent the wheel?

I prefer to tint as few colors as possible.  In the batch of cookie pictured, I tinted some icing red and some green, while leaving the majority white.  I discovered and loooooved the Wilton FoodWriter markers last year for making super cute, detailed, and easy decorations on my cookies and can't imagine going back to tinting a million different colors of icing.


Thursday, September 27, 2012

Jacques Torres Chocolate Chip Cookies

Difficult: Not any more so than other cookie recipes
Timely: only passively, the cookies have to sit overnight before baked.


These chocolate chip cookies are the bomb-diggity!!  They bake up huge and thick, the outside gets crisp while the inside stays incredibly soft and chewy and full of chocolate.  This is the infamous recipe by Jacques Torres and was published in the New York Times.  It's been floating around Pinterest for quite some time but I always put off making it because it includes bread flour and cake flour which I don't keep on hand.

Don't let the inclusion of bread flour and cake flour deter you from making these cookies. Believe me I put off baking anything that included "other" flours (aka not all-purpose) but these have changed my mind. The bread flour, with it's extra gluten, give the cookies their heft. The cake flour (with a lower gluten content) offsets the bread flour for a delicate and chewy bite. Trust me, it's worth it.

These cookies are freakin' huge! After I made the dough, I weighed it and it came in at a whopping 4 pounds and 5 ounces. And 1 pound of that came from the chocolate chips. JT would tell you that making your cookies huge are one of the secrets to their success (3.5 ounces per cookie). But I'm a quantity girl and I discovered a chewy and crisp cookie weighing in at only 1.75 ounces. Although not as thick, still incredible in my book.

The one on the left weighs 3.5 ounces, the one on the right weighs 1.75 ounces.
3.5 ounce cookie bakes to around 5-6 inches in diameter.
The 1.75 ounce cookies bakes to about 3 inches in diameter.

The only downer to this recipe is that it doesn't offer immediate gratification - once you prepare the dough, you have to wait an excruciating 24-36 hours before you bake. Torture, I know. But totally worth it. The overnight sit in the fridge helps the dough come together and allows all the liquid ingredients to really absorb into the dry ones, which helps to produce a chewy texture and to not spread too much when they bake in the oven.


The recipe

Ingredients
2 cups minus to 2 tablespoons cake flour
1 2/3 cup bread flour
1 1/4 teaspoon baking soda
1 1/2 teaspoon baking powder
1 1/2 teaspoon salt
1 1/4 cups (2 1/2 butter) butter, unsalted, room temperature
1 1/4 cups light brown sugar
1 cups plus 2 tablespoons granulated sugar
2 large eggs
2 teaspoon vanilla extract
1 1/4 pounds chocolate (the original recipe recommends at least 60 percent cacao content, I just used 2 bags of semisweet)
Sea salt for garnish

Directions

1.  In a medium bowl, whisk together the flours, baking powder and soda, and salt. Set aside.

2.  In the bowl of your stand mixer with the paddle attached (or using a hand mixer), cream the sugars and butter until light and fluffy (about 5 minutes set to speed 6 on a Kitchen Aid). Decrease the mixer speed and add eggs one at a time mixing thoroughly after each addition. Add the vanilla and mix until incorporated.

3.  Slowly add the flour mixture and mix until just incorporated, about 5-10 seconds. Add chocolate chips and mix until evenly distributed. You can mix the chips in by hand if you prefer. Whichever floats your boat.

4.  Press Saran wrap over the surface of the dough and refrigerate 24-72 hours. Or create a neat little block of cookie dough and wrap in Saran wrap and pop that into the fridge if you don't want the bowl taking up space.

5.  Weigh out dough using a digital kitchen scale to 3.5 or 1.75 ounces, then bake at 350 degrees according to the specifications below:
  • Large cookies will bake to 5-6" in diameter and will yield 18-20 cookies: weigh dough out to 3.5 ounce balls (a little bit larger than golf balls).  Space dough a few inches apart (4-6 to a sheet unless you have huge professional sheets, then you can do more) on a parchment lined baking sheet.  Garnish with sea salt. Bake for 18-20 minutes.
  • Smaller (but not small) cookies will bake to 3" in diameter and yield around 3 dozen cookies: weigh dough out to1.75 ounce balls (just smaller than a golf ball) and place a few inches apart on a parchment lined baking sheet (6 fit on a regular baking sheet for me).  Garnish with sea salt.  Bake for 14-16 minutes. 
 Some tips:
  • Take cookies out of the oven just when the tops are starting to look brown for a softer cookie.  
  • Rotate your pans during baking- especially if your oven has hot spots. 
6.  Leave cookies to cool on pan for 10 minutes then transfer to a wire rack to cool completely. Or eat immediately with milk.

If you dislike the odd quantities of ingredients required for these cookies (although I honestly didn't have a problem measuring out 2 cups plus or minus 2 tablespoons), check out the Cilantropist's version of these cookies.

Inspired by Bakerella 
Some input on size from the Cilantropist
Recipe from ABC's The Chew