Thursday, June 21, 2012

Chewy Brownies & Thick and Chewy Chocolate Chip Cookies

Last week, my husband and I spent the week in Sanibel Island, Florida with my brother and his girlfriend. Look how pretty it was:


It was an 18 hour drive from Ohio, and let me tell you I am NOT much of a car trip person. But it was worth the savings in gas, and it let me visit some family in Georgia. I thought it'd be nice to have some home baked goodies for the drive and while on vacation. I stumbled around Brown Eyed Baker for awhile and came across two recipes that really interested me: Thick and Chewy Chocolate Chip Cookies and Chewy Brownies. Both from the America's Test Kitchen crew, so I figured they couldn't be bad.


They were good. They weren't great. But they were good. I much prefer the brownies I made a few weeks ago, which I just made again yesterday and shared with family. As for the cookies, I deviated ever so slightly from the recipe, and while they tasted awesome, their chewy texture didn't last for more than a day - likely because I made my cookies smaller than the recipe recommended which I recently learned can affect texture if your not careful about baking time. Either way. Both recipes were good, but I probably wouldn't make either again. But give them a try, you be the judge!

Up first: Chewy Brownies!


Ingredients

1/3 c Dutch-processed cocoa (I used regular, unsweetened cocoa, but dutch processed is supposed to give a better flavor.  Use it if you have it)
1½ t instant espresso (optional, but I used it - it helps deepen the chocolate flavor)
 ½ c plus 2 T boiling water (5 oz)
2 oz unsweetened chocolate, finely chopped
4 T (½ stick) unsalted butter, melted
½ c plus 2 T vegetable oil
2 large eggs
2 large egg yolks
2 t vanilla extract
2½ c (17½ oz) sugar
1¾ c (8¾ oz) all-purpose flour
¾ tsalt
6 oz bittersweet chocolate, cut into ½-inch pieces

1. Preheat the oven to 350 degrees and check to make sure the oven rack is in the lowest position. Line a 9×13-inch baking pan with foil or parchment paper (leave an inch or so overhang on all sides). If using foil, spray with nonstick cooking spray.  Set the pan aside.

2. Sift cocoa into a large bowl and whisk with espresso powder and boiling water together until smooth. Add unsweetened chocolate and whisk until chocolate is melted. Whisk in melted butter and oil (the mixture may look curdled - don't worry) Add eggs, yolks, and vanilla and continue to whisk until smooth and fully combined.

3.  Whisk the sugar into the chocolate mixture. Add flour and salt and mix with rubber spatula until there are no streaks for flour visible. Fold in bittersweet chocolate pieces.

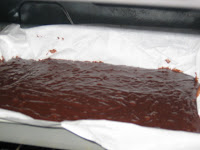
3. Pour and scrape the batter into the pan and bake for 30 to 35 minutes - until toothpick inserted halfway between edge and center comes out with just a few moist crumbs attached. Transfer pan to wire rack and cool 1½ hours (don't remove the brownies from the pan yet).

4. Using the foil/parchment overhang, lift the brownies from the pan. Continue to cool the brownies on the wire rack and let cool completely (this takes about 1 hour). Cut into desired sizes and serve.


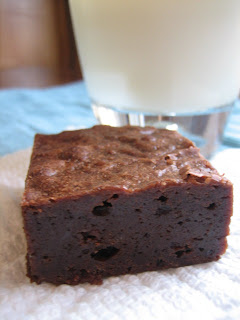
awesome with a glass of milk!

 (Brown Eyed Baker took this recipe from Cook’s Illustrated, March & April 2010 issue)

Up next, Thick and Chewy Chocolate Chip Cookies:


Ingredients: (For this recipe, I tried weighing my ingredients using a digital kitchen scale, since that was what was recommended from the original recipe, but measuring cups work just fine if you don't have one)

2 c plus 2 T (10 5/8 ounces) unbleached all-purpose flour
1/2 t baking soda
1/2 t salt
12 T (1 1/2 sticks) unsalted butter, melted and cooled until warm
1 c packed (7 ounces) light or dark brown sugar
1/2 c (3 1/2 ounces) granulated sugar
1 large egg plus 1 egg yolk
2 t vanilla extract
1-1 1/2 cups semisweet chocolate chips

1. Adjust the oven racks to the upper- and lower-middle positions and heat the oven to 325 degrees. Line 2 large baking sheets with parchment paper or spray them with nonstick cooking spray.

2. Whisk the flour, baking soda, and salt together in a medium bowl; set aside.

3. Either by hand or with an electric mixer, mix the butter and sugars until thoroughly blended. Beat in the egg, yolk, and vanilla until combined. Add the dry ingredients and beat at low speed just until combined. Stir in the chips to taste.

4. Roll a scant 1/4 cup of the dough into a ball. Hold the dough ball with the fingertips of both hands and pull into 2 equal halves. Rotate the halves 90 degrees and, with jagged surfaces facing up, join the halves together at their base, again forming a single ball, being careful not to smooth the dough’s uneven surface. Place the formed dough balls on the prepared baking sheets, jagged surface up, spacing them 2 1/2 inches apart. This should give you an idea of how to do it - it's what gives bakery cookies their unique surfaces (image from Baking Illustrated, uploaded by Brown Eyed Baker).

5. Bake until the cookies are light golden grown and the outer edges start to harden yet the centers are still soft and puffy, 15 to 18 minutes, rotating the baking sheets front to back and top to bottom halfway through the baking time. Cool the cookies on the sheets. Remove the cooled cookies from the baking sheets with a side metal spatula.


yum!
(Brown Eyed Baker took this recipe from the book Baking Illustrated on page 434)


Monday, June 11, 2012

DIY Colored Sugar

Difficulty: Easy
Time consuming: No


I saw a really interesting post on Pinterest the other day about making edible glitter.  I was pretty excited because even though I didn't have a project in mind, I could already see my cookies and cupcakes sparkling.  I followed the pin to the original site and it showed bowls of colorful and glittery glitter.  Using salt.  Eh, not so great for decorating sweets.  But another pinner had commented on it saying you could do it with sugar. 

So why not?  I measured 1/4 cup of sugar into a bowl and added 1/2 teaspoon of  liquid food coloring (I did mostly red with some drops of yellow), mixed until there was no more white, and baked on a foil lined baking sheet at 350 degrees for 10 minutes.  I was pretty sure the sugar was gonna melt together and I'd throw the whole thing away.  To my surprise, the sugar dried nicely with an awesome tint of red.  I sifted the sugar through a fine wire mesh sieve and stored in an airtight container.  Colored sugar can be pricey at stores and it's nice to know I can make my own at home!


1
2
3
4
Ta da!


Adapted from Planetpals Craft Page

Monday, June 4, 2012

The Best Brownie I Ever Made


Difficulty level: mostly easy
Time consuming: not actively, but waiting for the brownies to cool before you cut them seems to take forever.

This past weekend, my husband went to Columbus for the night to watch the state high school rugby tournament. His team didn't make it this year, but it'd be pretty hard to convince him not to go to a rugby match and hang out with some old college friends. With the house to myself, I made these brownies from Brown Eyed Baker. She got the recipe from the Baked: New Frontiers in Baking cookbook, hence the name Baked Brownies.  I have never made brownies from scratch before, so I was a tad nervous at how they'd turn out.  These brownies smelled so amazing right out of the oven that, before they could even cool, I had cut into them, and I sorta felt like this:
Photo Credit: someecards.com
 I seriously could've eaten the whole pan, they were that good.  My husband will be lucky if there are any left when he gets home.  God help me.

These brownies turned out so dense, and moist, and decadent, I was in brownie heaven.  These brownies do not have a cakey or chewy texture.  I guess they are closest to a "fudgy"  brownie.  I typically like chewy brownies, and Brown Eyed Baker has a recipe that I'll have to try the next time a brownie craving hits.

 Start by lining a light colored 13x9 baking pan with parchment paper.  The BEB recipe says to butter it first then line it, which to me defeats the purpose of lining it because then I'll still have to wash the pan.  So I did not butter my pan first.
This recipe called for 11 ounces of dark chocolate.  I bought the Ghiradelli 60% Cacao chips which came in a 10oz package and was a better deal then the Ghiradelli 60% bar of baking chocolate.  I tared my kitchen scale to the measuring cup and weighed in some semisweet chips until I hit a total of 11oz.
Put your butter, chocolate chips, and espresso powder in a large heat proof bowl and set over a pot of simmering water to melt, stir with a whisk frequently.
 While that's going (or do this first), measure the dry ingredients in a bowl - that's your flour, cocoa powder, and salt.  I always sift my cocoa powder because it's full of lumps.  Whisk to combine.

 If you forget to pull out your eggs 15 minutes ahead of time so they're at room temperature, stick them in a bowl of warm water for 5 minutes to help get them there.
 Don't forget to keep whisking your chocolate mixture.
 Take your chocolate off the heat and add your sugars.  BEB said to leave it over the pan of hot water, but I'm not really sure why, since you're not trying to melt the sugar.  She also said that adding your sugar should bring the temperature of your chocolate down to room temperature.  Mine did not.  If it didn't cool down, stick it in the fridge for a few minutes to cool down, because you're going to add egg next and you don't want to accidentally cook the egg.
 Take 3 of your eggs and mix them in a separate bowl.  It doesn't have to be super scrambled, but make sure to break the yolk up.  Add this to your luke warm chocolate/sugar mixture and mix until just incorporated.  Get the remaining 2 eggs and mix them in your extra bowl, then add to your chocolate/sugar/egg mixture, mixing until just combined..  BEB said that if you over mix in this step, you can end up with cakey brownies.  Adding the eggs in two additions helps prevent over mixing, as does breaking the eggs up in an extra bowl.  

At this point, you should also add vanilla, like the recipe calls for, but I forgot :(

Add your flour mixture to your chocolate mixture.  Stop using your whisk and get a spatula.  Fold the flour in until just incorporated.  You don't want to see more than small streaks of flour.  The batter will be lumpy.  If you over mix, you risk producing gluten with the flour which will change the texture and consistency of your finished brownie.

Bake at 350 degrees for 30 minutes, rotating the pan halfway through baking.  Remove from the oven when a toothpick inserted in the center only has a few moist crumbs stuck to it.

Wait for it to cool completely in the pan before lifting the brownie out by the parchment paper overhang.  If you used a glass baking dish, let them cool in the dish for 10 minutes, then remove to a cooling rack - the residual heat in the glass can continue to cook the brownies.  
...or be impatient like me and cut out a corner to taste.
Cut into desired sizes and enjoy with milk.  

Ready for the recipe?

Baked Brownies - from the Brown Eyed Baker.

Ingredients:
1¼ cups all-purpose flour, spooned and leveled
1 teaspoon salt
2 tablespoons unsweetened cocoa powder
11 ounces dark chocolate, coarsely chopped if you are using a bar (or 10oz 60% cocoa chips by Ghiradelli and 1oz of any semisweet chocolate chips)
1 cup (8 ounces) unsalted butter, room temperature OR cut into 1" pieces so they'll melt easier
1 teaspoon instant espresso powder
1½ cups granulated sugar
½ cup packed light brown sugar
5 eggs, at room temperature
2 teaspoons vanilla extract

1) Preheat the oven to 350 degrees F. Line a light colored 9x13 baking pan with parchment paper.

2)  In a medium bowl, whisk the flour, salt, and cocoa powder together.

3)  Put the chocolate, butter and instant espresso powder in a large bowl and set it over a saucepan of simmering water, stirring occasionally, until the chocolate and butter are completely melted and smooth.  remove the bowl from the heat and add the sugars. Whisk until completely combined - the mixture should be room temperature.  If it's not, keep whisking until the mixture has cooled or stick it in your fridge/freezer for a couple of minutes (but not too long! You don't want it to be cold)

4)  In a separate bowl, mix/scramble 3 eggs together, then add to the chocolate mixture and whisk until combined. In your separate bowl, dd the remaining eggs, scramble, then add to the chocolate mixture and whisk until combined. Add the vanilla and stir until combined. Do not overbeat the batter at this stage or your brownies will be cakey.

5)  Sprinkle the flour mixture over the chocolate mixture. Using a rubber spatula (not a whisk), fold the flour mixture into the chocolate until just a bit of the flour mixture is visible.

6)  Pour the batter into the prepared pan and smooth the top. Bake in the center of the oven for 30 minutes, rotating the pan halfway through the baking time, until a toothpick inserted into the center of the brownies comes out with a few moist crumbs sticking to it.

Let the brownies cool completely, then lift them out of the pan using the parchment paper. Cut into squares and serve.

7)  Store at room temperature in an airtight container or wrap with plastic wrap for up to 3 days.  If you want to serve them warm, microwave for 5-10 seconds to get that fresh-from-the-oven warmth.

[Brown Eyed Baker adapted this recipe from Baked: New Frontiers in Baking]